McAze logo
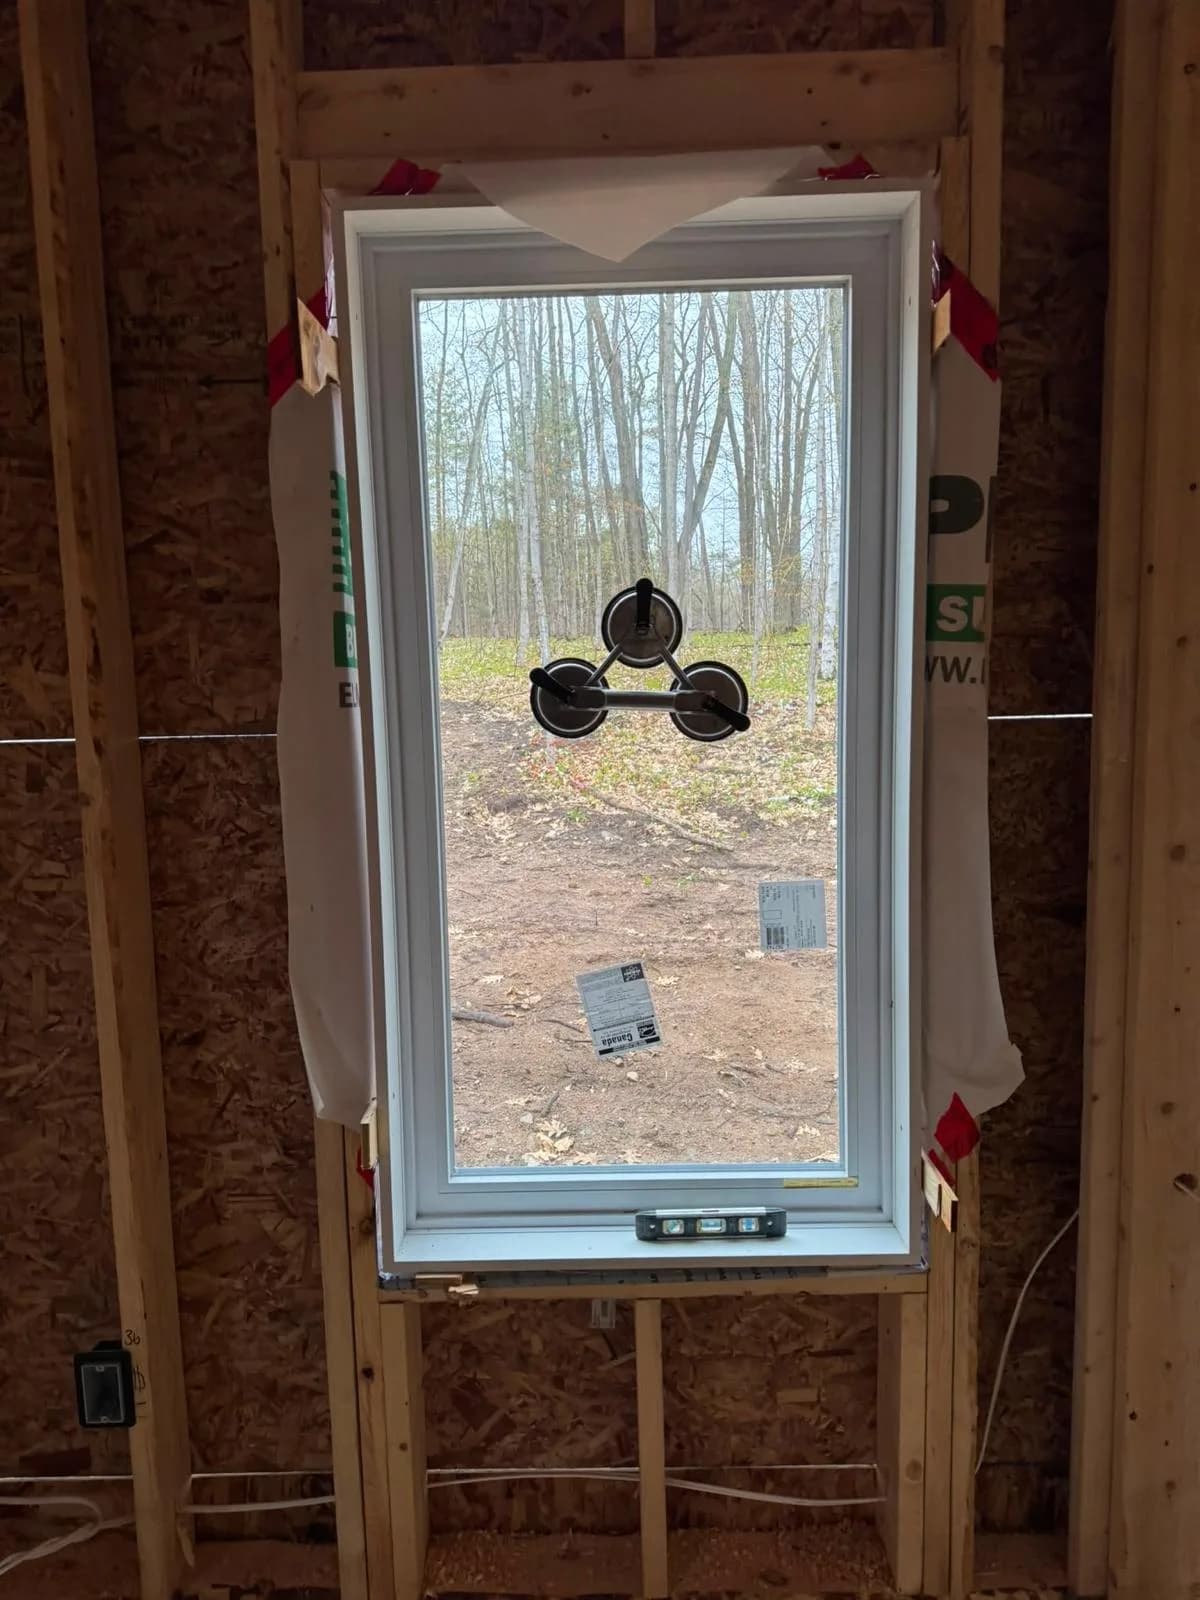
New construction windows installed on a Markham home with exterior insulation visible

Featured Project · Markham, Ontario

New Construction Window & Exterior Door Installation in Markham

A coordinated new construction installation of multiple energy-efficient residential windows and a glazed exterior entrance door, completed with careful rough-opening preparation, precise alignment, structural fastening, flashing and weather-barrier integration.

Project overview

A carefully coordinated opening package for a new Markham residence

Windows and exterior doors are among the most important transitions in a new home’s building envelope. They must look aligned from the street, operate smoothly from the inside and connect correctly to the layers that manage water and air around the structure. For this Markham, Ontario project, McAze installed a coordinated package of dark-framed windows and a glazed exterior entrance door while the residence was still in the construction phase.

The work called for more than placing units into framed openings. Each opening was reviewed, the units were supported and adjusted, and the perimeter details were prepared for the next stages of insulation, interior finishing and exterior cladding. The result is a clean, contemporary exterior appearance backed by the careful installation practices that help the completed assembly perform as intended.
The challenge

Accuracy across every opening and wall layer

The openings varied in size and proportion, including wide horizontal units and tall windows with upper sections. Maintaining consistent sightlines across the elevations required each frame to be checked independently while still being considered as part of the full exterior composition.

Because the project was active new construction, the installation also had to coordinate with exposed framing, rigid exterior insulation, house wrap and unfinished interior surfaces. The perimeter of every unit needed to remain accessible for air sealing, insulation and finish work without sacrificing the water-management sequence outside.

A wooded site and changing outdoor conditions made protection and housekeeping especially important. Glass, factory finishes and frame corners had to be handled carefully while ladders, temporary supports, tools and other trades remained active around the building.

The solution

A measured, opening-by-opening installation process

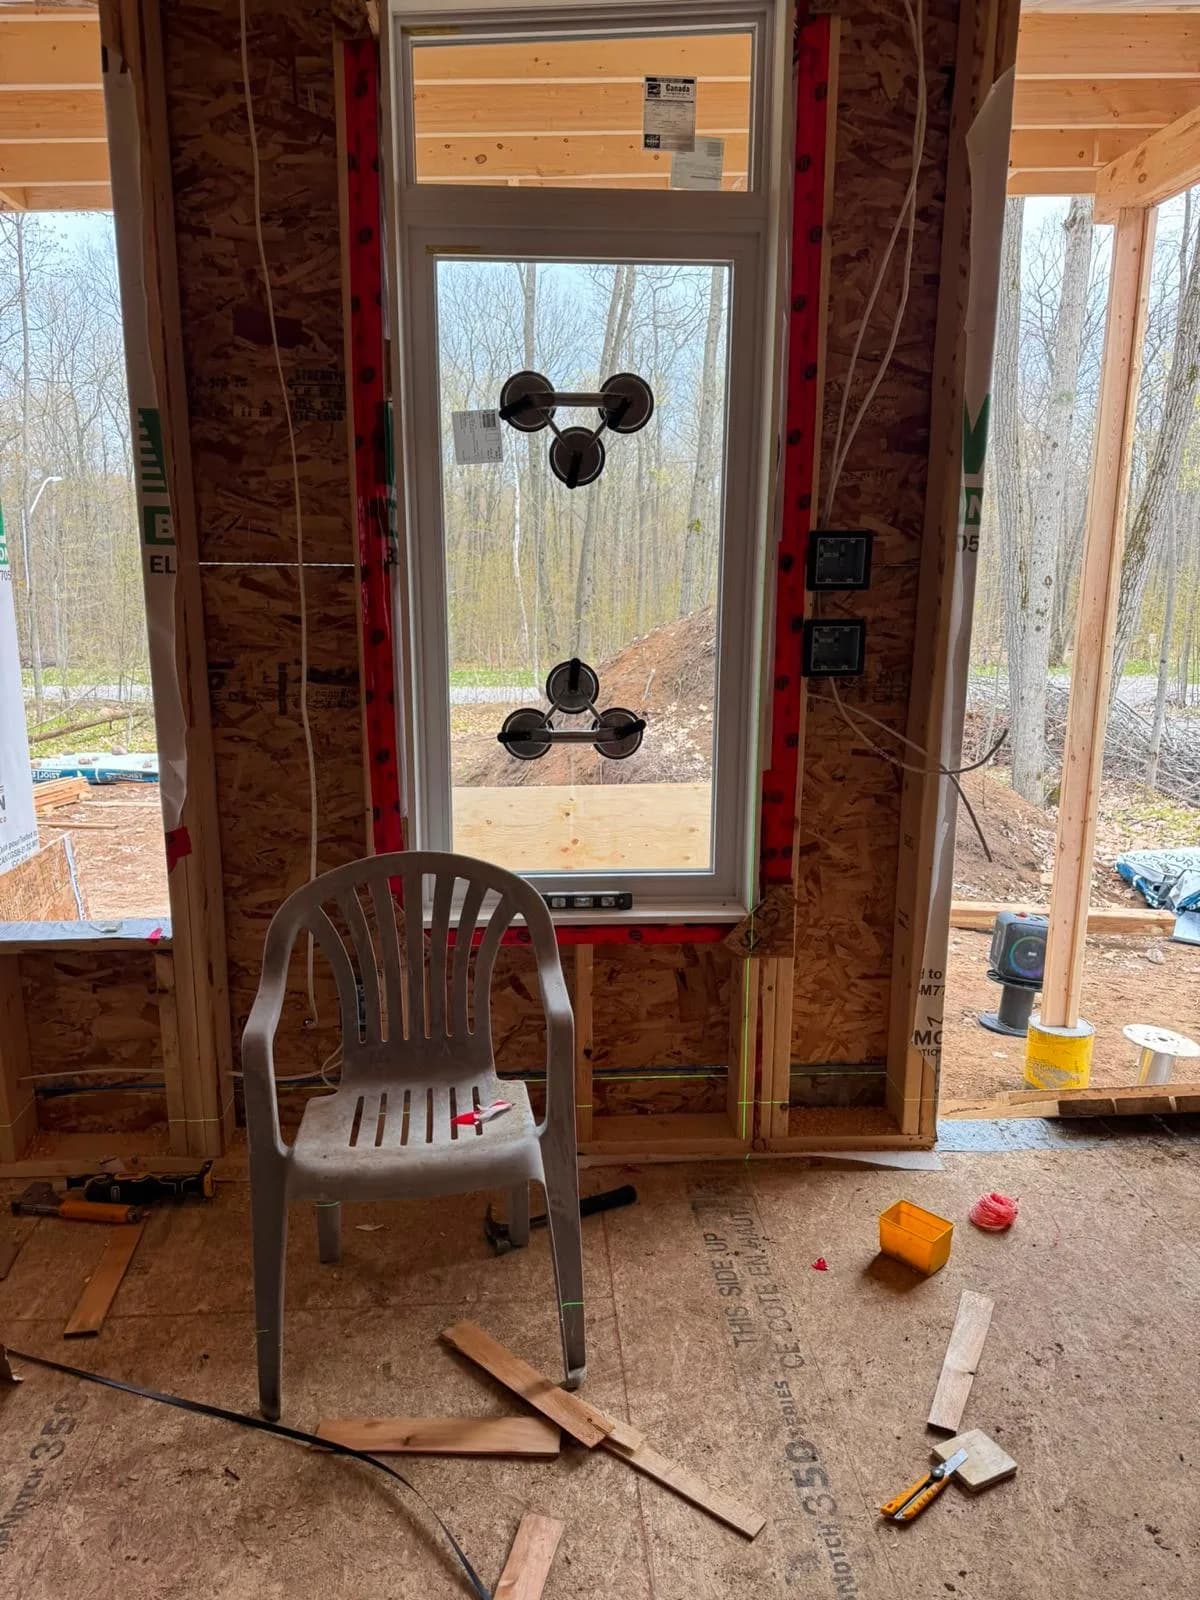
McAze approached the installation opening by opening. Rough openings were inspected and prepared before each window or door was moved into position. Temporary supports, shims, levels and glass-handling tools were used to establish a controlled fit rather than relying on the framed opening alone.

Once a unit was level, square and operating correctly, it was fastened in accordance with the installation requirements. Particular attention was given to sill conditions, lower corners and perimeter transitions—the locations where a continuous drainage and flashing strategy matters most.

On the exterior, flashing membrane was integrated with the surrounding weather-resistive layers to support positive drainage. On the interior, the installation was left ready for perimeter insulation, air sealing, drywall returns and trim. This sequencing kept the work compatible with both the exterior cladding system and the interior finishing plan.

Complete scope

Window, exterior door and building-envelope work

The installation was planned as one connected scope so frame geometry, exterior water management and the interior finishing sequence could support one another.

01

Rough-opening inspection and preparation

02

Installation of multiple new construction windows

03

Glazed exterior entrance door installation

04

Levelling, squaring, shimming and temporary bracing

05

Structural fastening and frame verification

06

Sill and perimeter flashing membrane

07

House-wrap and weather-barrier integration

08

Preparation for perimeter insulation and air sealing

09

Coordination with drywall, trim and exterior cladding

10

Glass, frame and factory-finish protection

11

Final operation and visual alignment checks

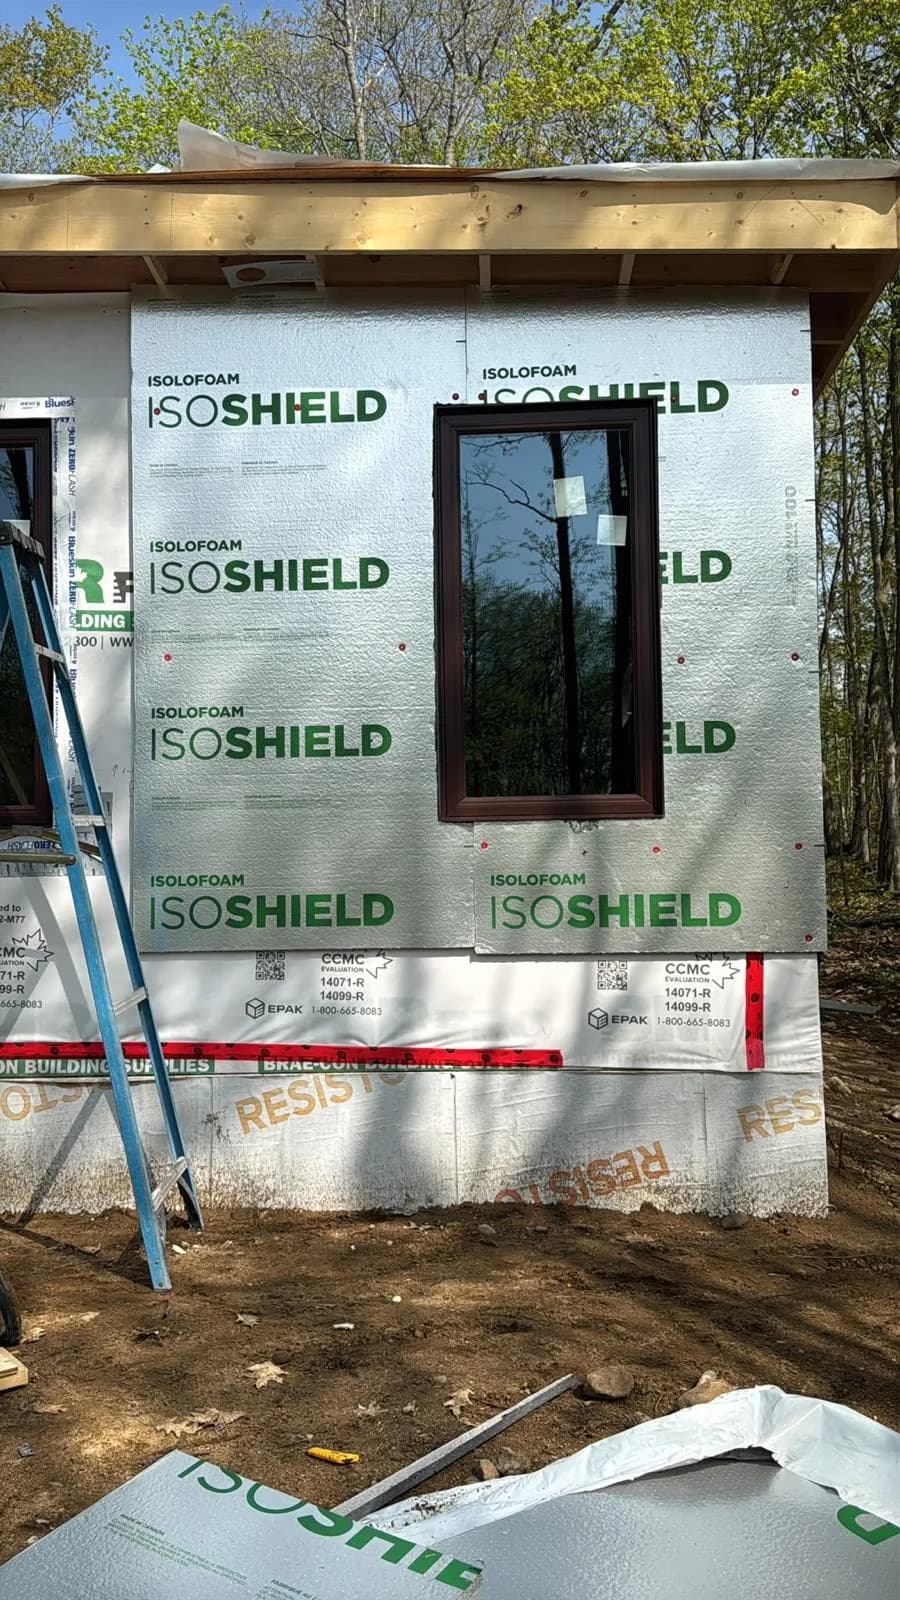
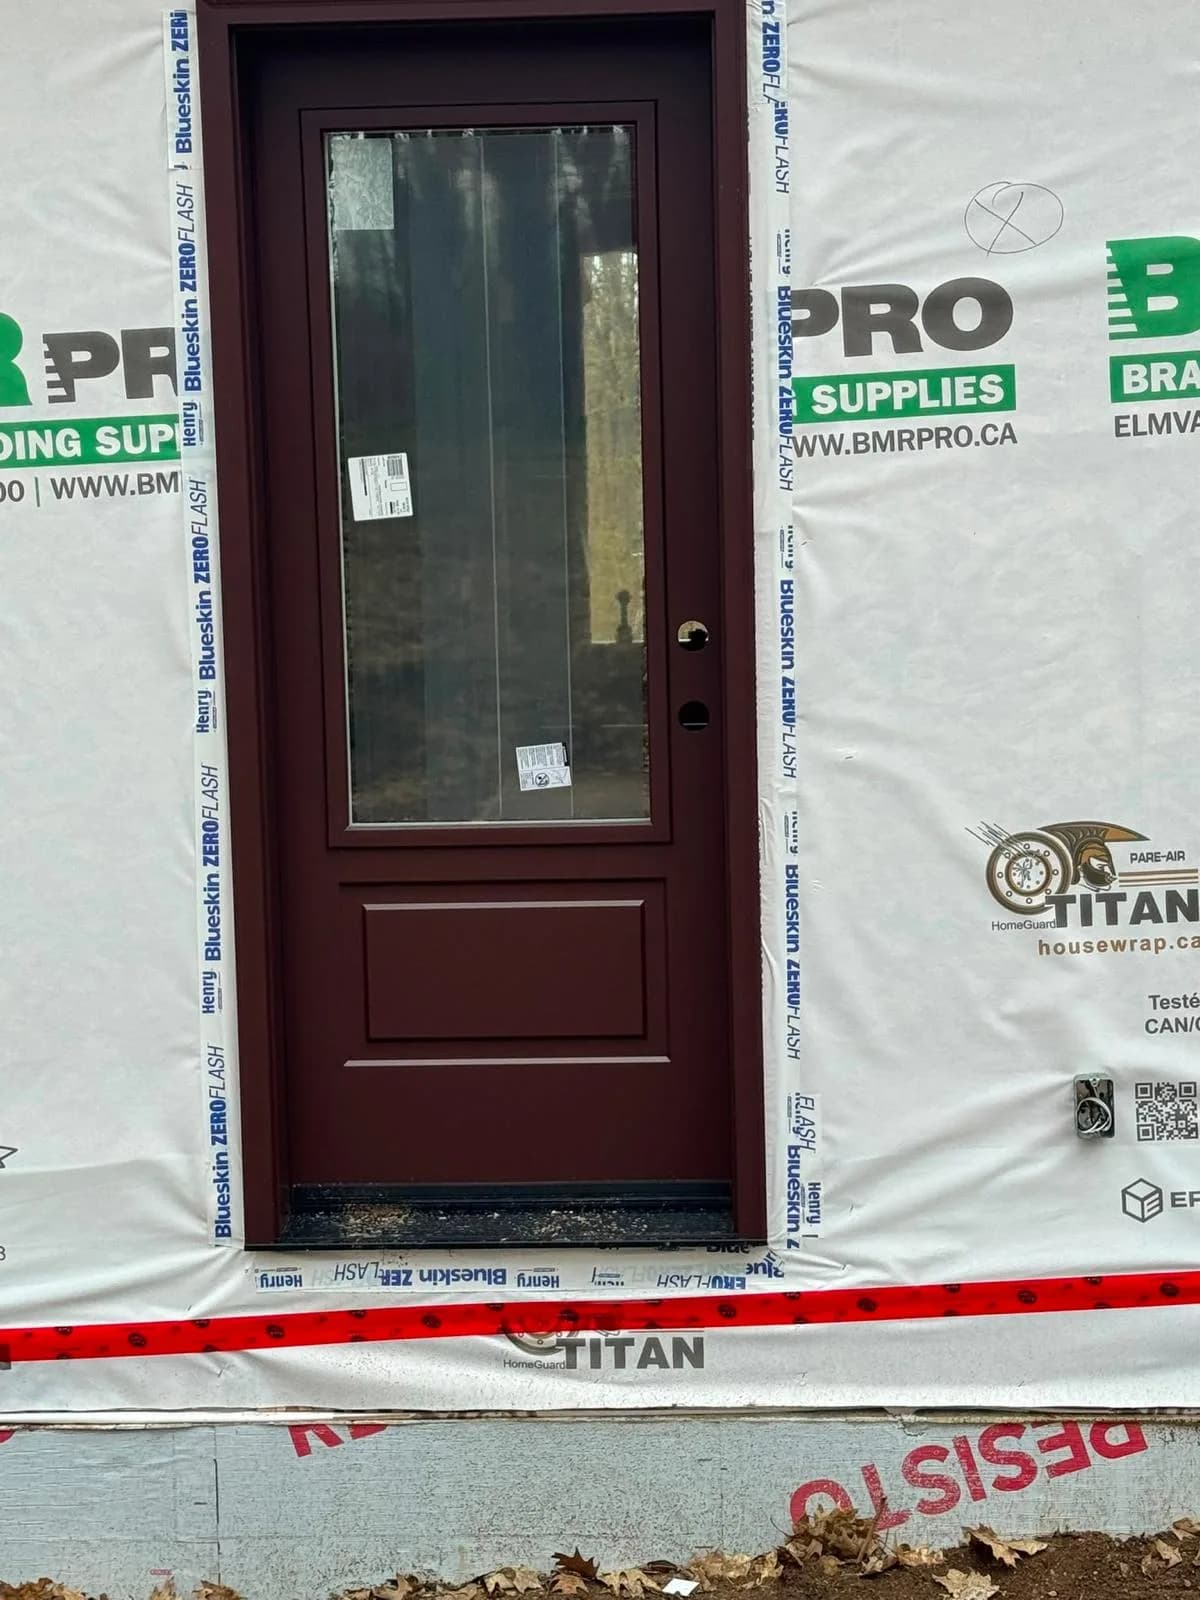
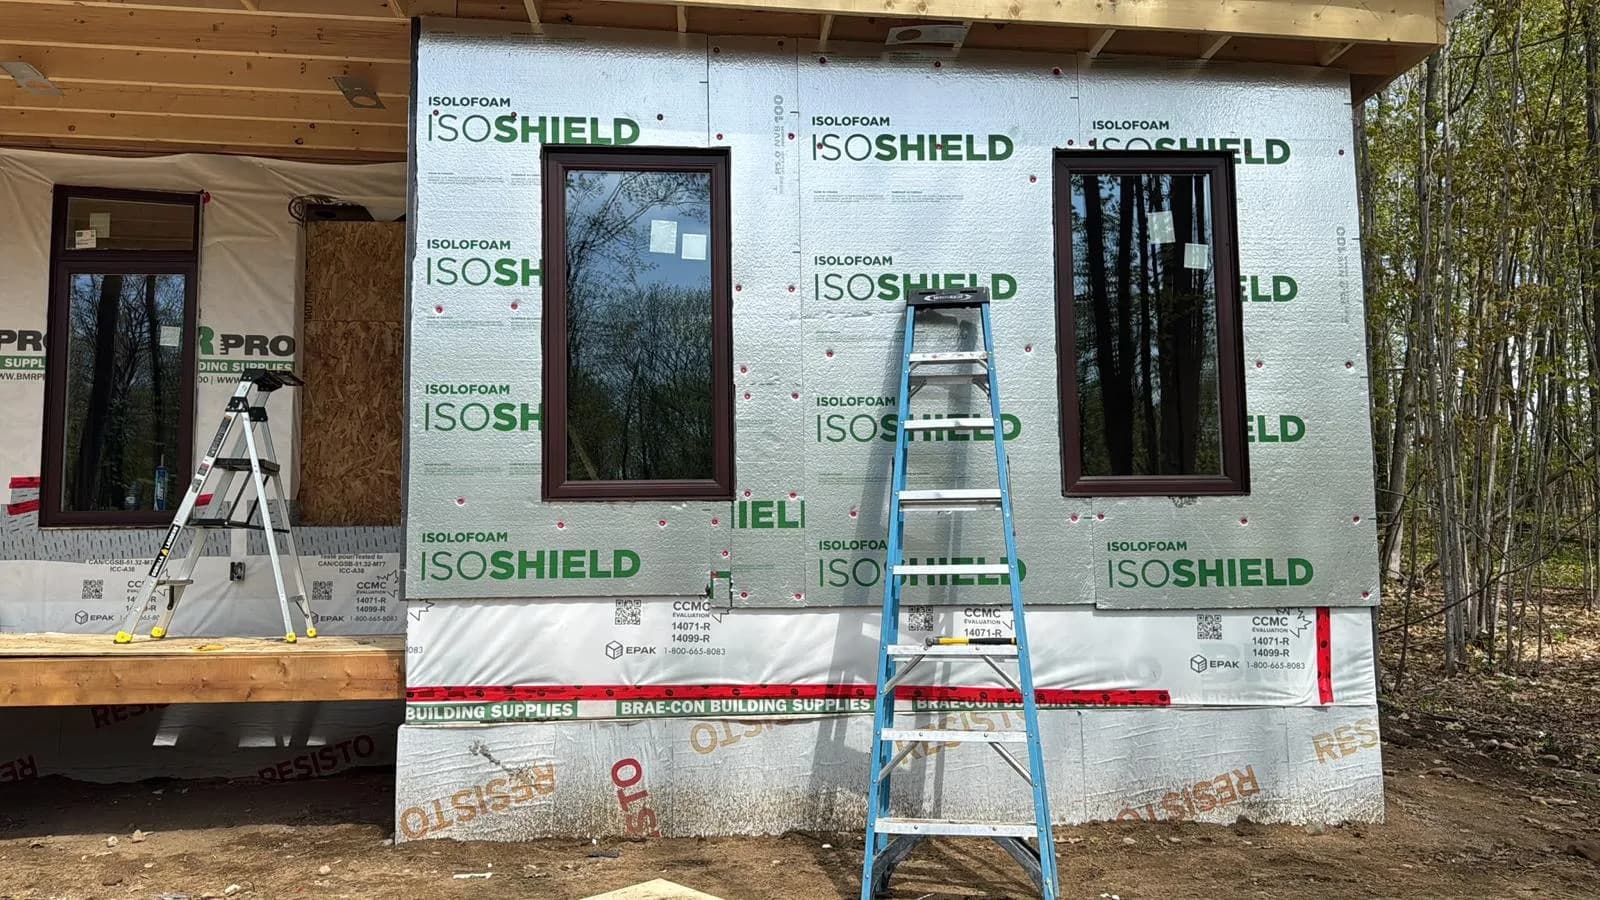
Front elevation of a Markham new build during window and exterior door installation

Exterior coordination

Consistent alignment across a developing façade

Wide and tall units were considered both individually and as part of the full elevation. That balance supports smooth operation, clean future cladding returns and a coherent contemporary exterior.

Installation strategy

Why correct window installation matters in a new Markham home

A high-quality window can only perform as well as the opening around it. If a frame is twisted, unsupported or forced into an irregular rough opening, the sash may bind, reveals can become uneven and the perimeter seal may be difficult to complete. Careful installation protects the investment in the product and gives the finishing trades a reliable reference for drywall, trim, siding and cladding.

In Southern Ontario, exterior openings also need a clear water-management path. Wind-driven rain, seasonal temperature changes, snow and freeze-thaw cycles all place demands on the junction between a window or door and the wall assembly. Flashing is therefore treated as a connected system rather than a decorative strip. The sill, jambs and head must work together with the weather-resistive barrier so incidental moisture is directed outward instead of being trapped behind the finish.

This project was completed while the wall assemblies were still visible, which allowed the team to inspect the relationship between framing, insulation, house wrap and each installed unit. That access is valuable: details can be checked before drywall or exterior cladding conceals them, and the next trades receive an opening that is properly positioned and ready for their work.

Precision first

Rough-opening preparation, levelling and structural support

The installation process began with the rough openings, not the windows. Dimensions and conditions were reviewed so that obstructions, uneven bearing points or framing issues could be addressed before a heavy glass unit was committed to place. This reduces unnecessary handling and helps avoid using fasteners to pull a frame into an opening that is not ready to receive it.

Each unit was then positioned on controlled supports and adjusted with shims. Levels and temporary bracing helped establish plumb jambs, a level sill and square corners. These measurements influence both appearance and operation. Even small deviations can become visible when several windows line up on one elevation or when interior trim reveals are installed later.

Support was placed deliberately so loads could transfer to the framing without distorting the window. Fastening followed only after the frame’s geometry and exterior alignment had been checked. The same disciplined sequence was used at the glazed entrance door, where the threshold, hinge side and latch side must work together for dependable operation and a consistent seal.

  • Openings reviewed before units were lifted into place
  • Temporary blocking used to control position safely
  • Level, plumb, square and diagonal measurements checked
  • Frames supported without over-shimming or distortion
  • Operation verified before perimeter finishes proceeded
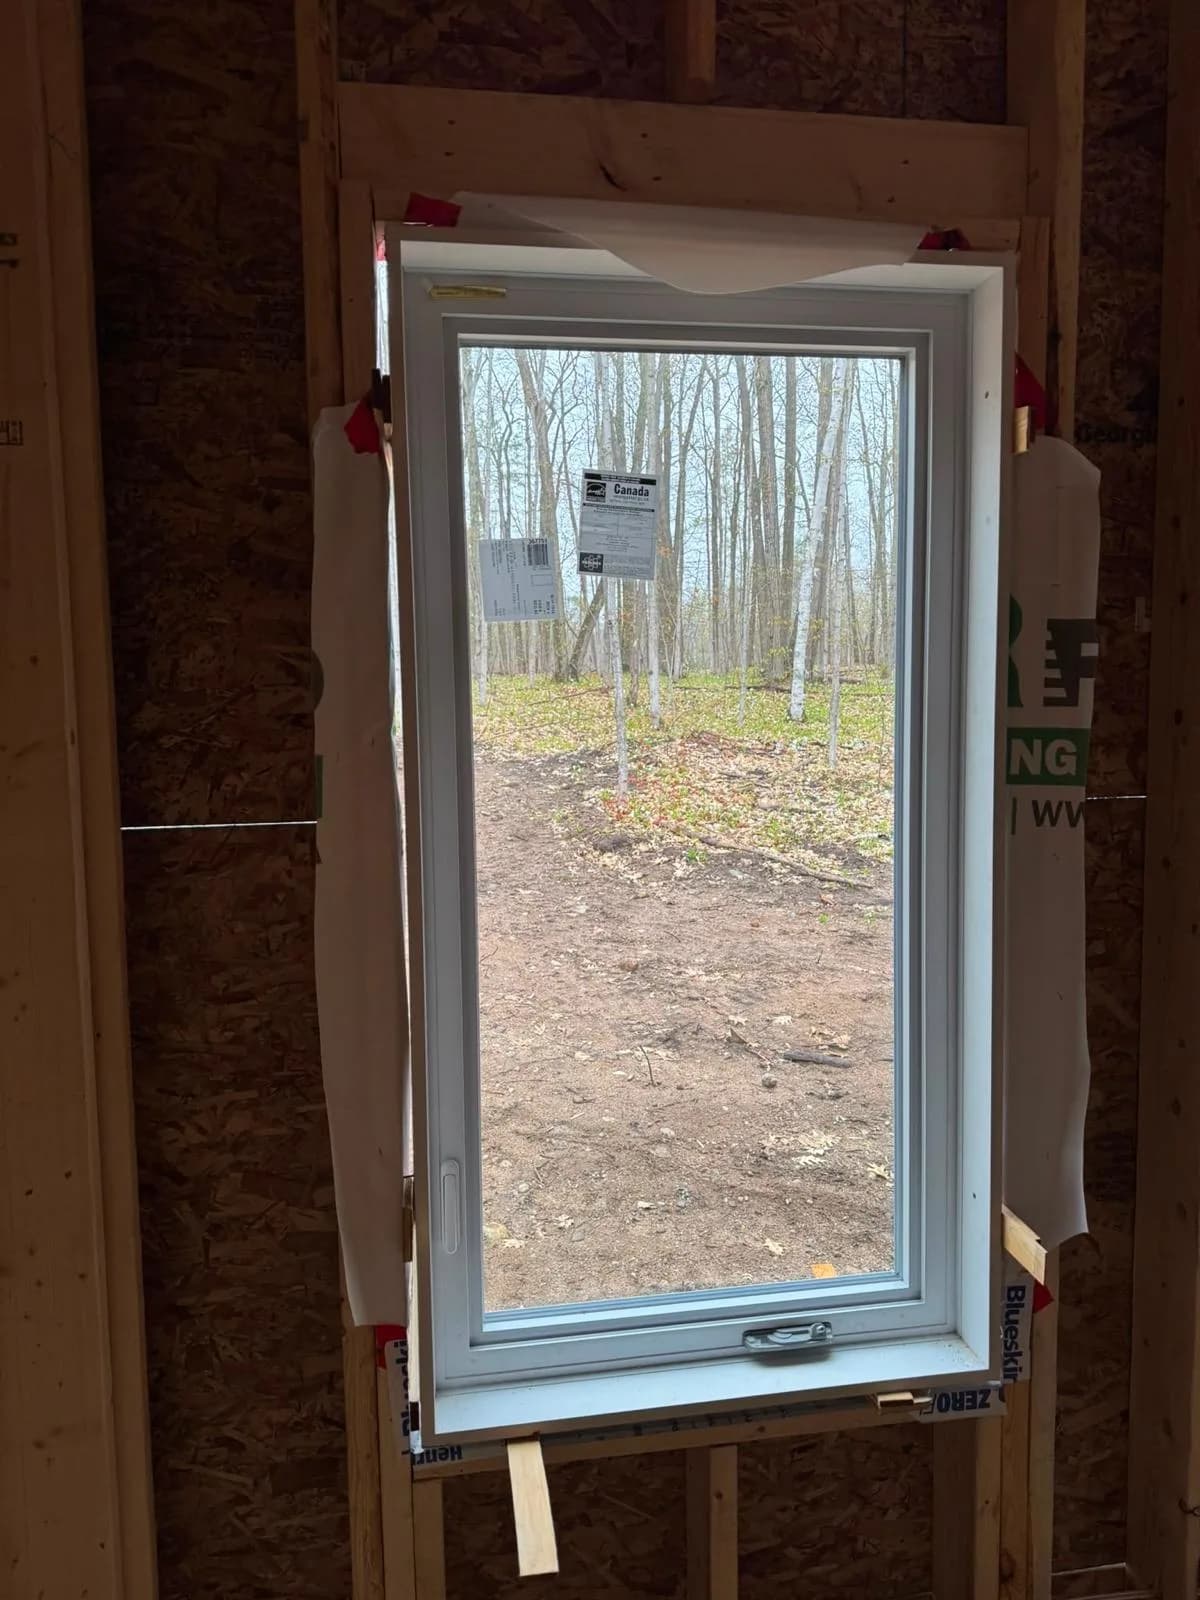
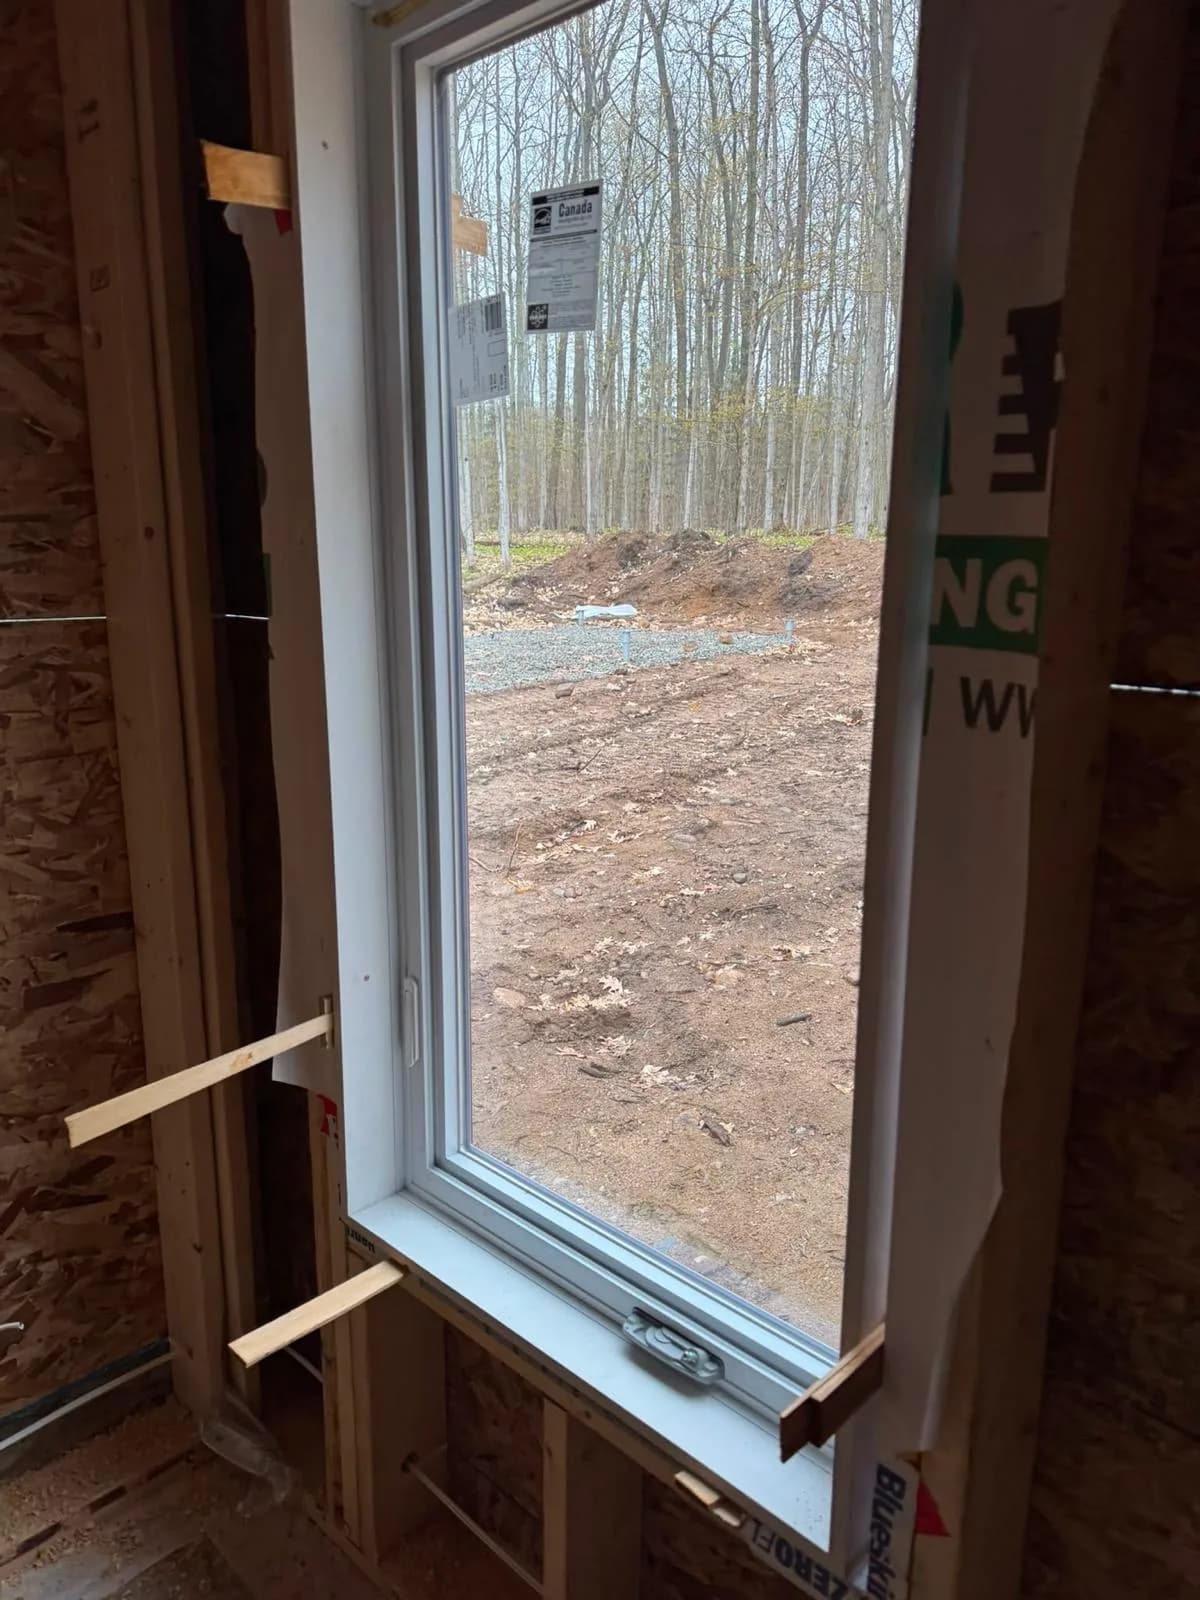
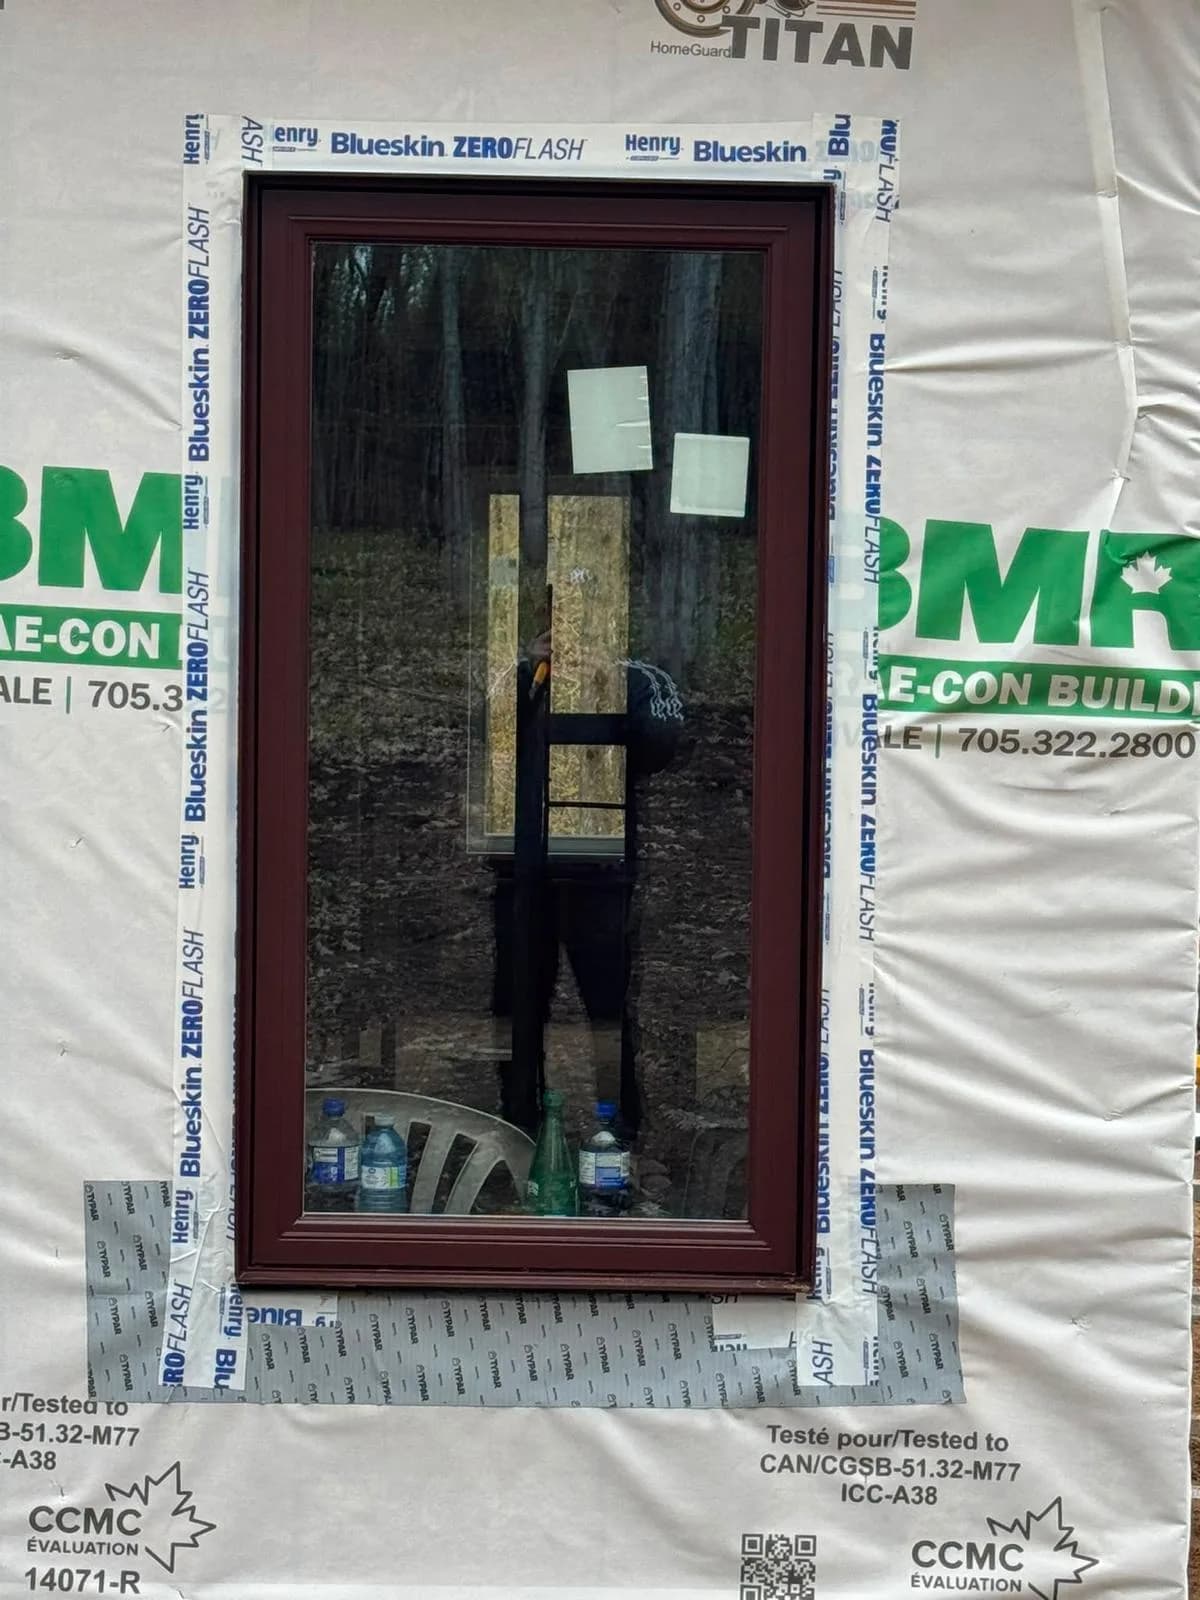
Henry Blueskin ZEROFLASH membrane around a new construction window
Perimeter flashing ties the window into the surrounding water-management layers.

Building envelope

Flashing and weather-barrier integration around windows and doors

The exterior photographs show the window and door perimeters during the waterproofing stage. A self-adhered flashing membrane was applied at key transitions and tied into the adjacent wall layers. The goal of this detailing is simple: maintain continuity and give water a path to the exterior. Achieving it, however, depends on correct sequencing and careful treatment of corners, overlaps and changes in plane.

Lower corners deserve particular attention because they sit at the meeting point of sill and jamb details. Membrane must conform without leaving open channels, and the sill strategy must remain compatible with drainage. At the sides, the flashing connects the unit to the surrounding weather barrier. Head conditions are detailed so upper layers shed over lower layers, following the same shingle-style logic used throughout a drained wall assembly.

The visible ISOSHIELD rigid insulation and weather-resistant layers were part of a larger exterior wall system that would eventually receive its finished cladding. McAze’s installation was coordinated so the cladding trade could form clean returns and maintain the intended drainage plane. On the interior, clear perimeter space remained available for spray foam or another specified insulation and air-sealing method.

  • Continuous transition from window or door frame to wall membrane
  • Sill and lower-corner details prioritized
  • Overlaps arranged to encourage outward drainage
  • Exterior work coordinated with rigid insulation and future cladding
  • Interior perimeter preserved for insulation and air sealing

Design coordination

A contemporary dark exterior with a bright interior finish

The selected units combine dark exterior frames with light interior surfaces. Outside, the dark frames create crisp outlines against the developing façade and suit the modern proportions of the new residence. Inside, the lighter finish connects naturally with the future drywall, casing and interior palette, helping the openings feel bright and integrated rather than visually heavy.

Consistency matters when several products share one building elevation. Head heights, mullion lines and frame depths were reviewed as the units were installed. The wide windows create horizontal emphasis, while the taller units bring daylight deeper into vertical spaces. The glazed entrance door continues the same language and brings natural light to the entry without separating it visually from the window package.

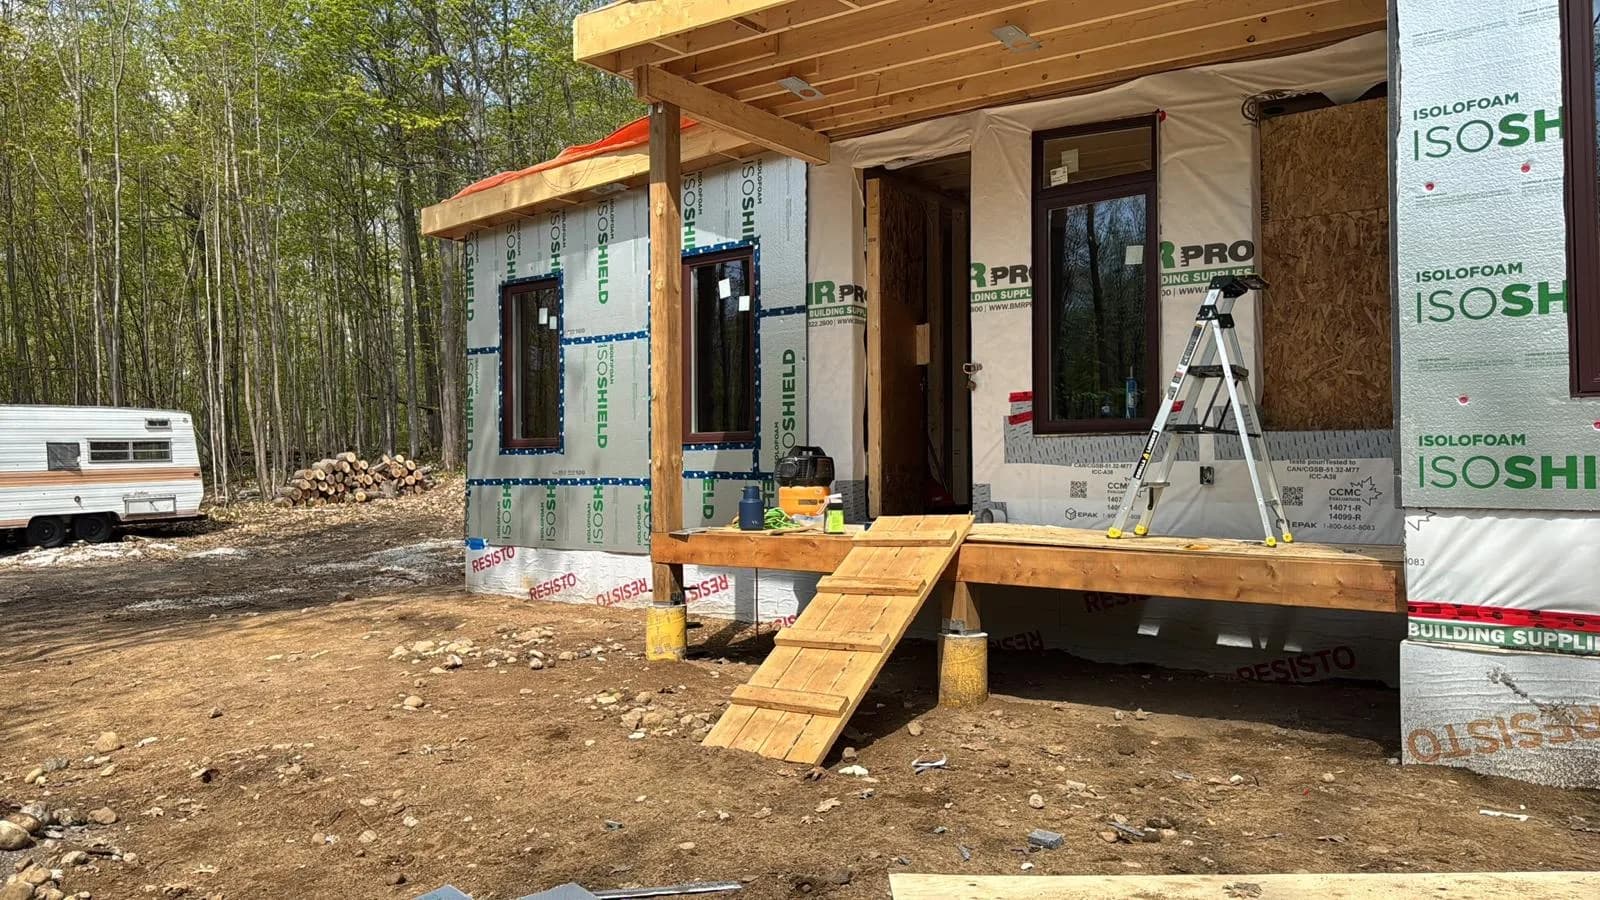
Because final siding, interior trim and paint were not yet installed, the construction photographs reveal the work that normally disappears. Temporary supports, visible framing and flashing are evidence of the installation phase, not a finished-room presentation. They show how the project was prepared so later finishes could meet the units cleanly and consistently.

Trade-ready handoff

Preparing the installation for insulation, drywall and exterior cladding

A window installation is one part of a sequence. Once frames were secured and exterior transitions detailed, the openings had to be handed off in a condition that supported the remaining work. Interior gaps were kept accessible for perimeter insulation and air sealing. Framing and frame positions provided clear references for drywall returns or casing, while exterior flanges and flashing remained compatible with the cladding build-up.

This trade-ready approach reduces the temptation for a later crew to alter or cover an important detail simply to make a finish fit. It also helps the project move forward without avoidable rework. When the opening geometry is sound, trim joints can be more consistent, siding returns can be planned accurately and sealant joints can be sized appropriately.

Before leaving the installation stage, the team reviewed visible frame condition, general alignment and operation. Protective handling remained important because construction would continue around the units. The project photographs document a clean transition point: windows and door installed, exterior waterproofing underway, and the surrounding assemblies ready for the next phases of the new home.

Local project insight

Planning window and exterior door work in Markham, Ontario

New construction and major renovation projects in Markham require coordination among design, framing, building-envelope and finishing teams. Window and door selections should be confirmed early enough that rough openings, wall thicknesses and exterior details can be planned around actual product requirements. Lead times, opening dimensions, glass configurations and finish colours can all affect the construction schedule.

Property owners and builders should also confirm permit, inspection and product requirements with the appropriate professionals and local authorities for their specific project. The photographs and description on this page document McAze’s work on this residence; they are not a substitute for project-specific architectural, engineering or manufacturer instructions.

McAze supports renovation and construction work across Markham and the Greater Toronto Area with practical site coordination and careful execution. If you are planning replacement windows, a new exterior door or a broader renovation that includes building-envelope changes, an early site review can help identify access, finish transitions and sequencing before the work begins.

Visible materials

Products and assembly components

  • Energy-efficient residential window units
  • Insulated glass assemblies
  • Glazed exterior entrance door
  • Dark exterior frames with light interior finishes
  • Henry Blueskin ZEROFLASH membrane
  • Weather-resistant house wrap
  • ISOSHIELD rigid exterior insulation
  • Wood shims, temporary supports and approved fasteners
  • Perimeter air- and water-sealing materials

Quality control

Checks before the work is concealed

  • Frame checked for level, plumb and square
  • Consistent reveal and alignment verified
  • Sash and door operation reviewed before finishing
  • Fastener placement and frame support confirmed
  • Sill, jamb and head flashing transitions inspected
  • Perimeter left ready for insulation and interior finish

Project FAQ

Questions about window and exterior door installation

Helpful planning context based on the scope shown in this Markham project.

What is included in a new construction window installation?

A typical scope can include reviewing and preparing rough openings, positioning and supporting the units, checking level and square, structural fastening, sill and perimeter flashing, integration with the weather barrier, and preparation for interior insulation and trim. Exact requirements depend on the selected product and wall assembly.

Why is flashing important around windows and exterior doors?

Flashing helps connect the opening to the wall’s water-management system. Correctly sequenced sill, jamb and head details direct incidental moisture outward and reduce the risk of water being trapped behind exterior finishes.

Can window and door installation be coordinated with exterior insulation?

Yes. The frame position, flashing approach, insulation thickness and future cladding returns should be considered together. Early coordination helps create a continuous weather barrier and cleaner exterior finish details.

When are window openings ready for drywall and interior trim?

After the units are supported, fastened, checked for operation and the perimeter air-sealing and insulation requirements are complete. The surrounding framing and frame position should give the interior finishing team a consistent surface and reveal.

Does McAze work on window and exterior door projects in Markham?

McAze serves Markham and other Greater Toronto Area communities. Project scope, product responsibility, access and scheduling are reviewed during the estimate process so the work can be planned around the specific property.

Serving Markham and the GTA

Planning renovation or exterior opening work in Markham?

Explore McAze's local service information, then request an estimate to review the property, intended scope and practical next steps.

Renovations in Markham

Discuss your window, door or renovation project

Request a free estimate and tell us what you are planning. McAze will review the scope, site conditions and sequencing needed to move the work forward clearly.

Get Free Estimate