McAze logo
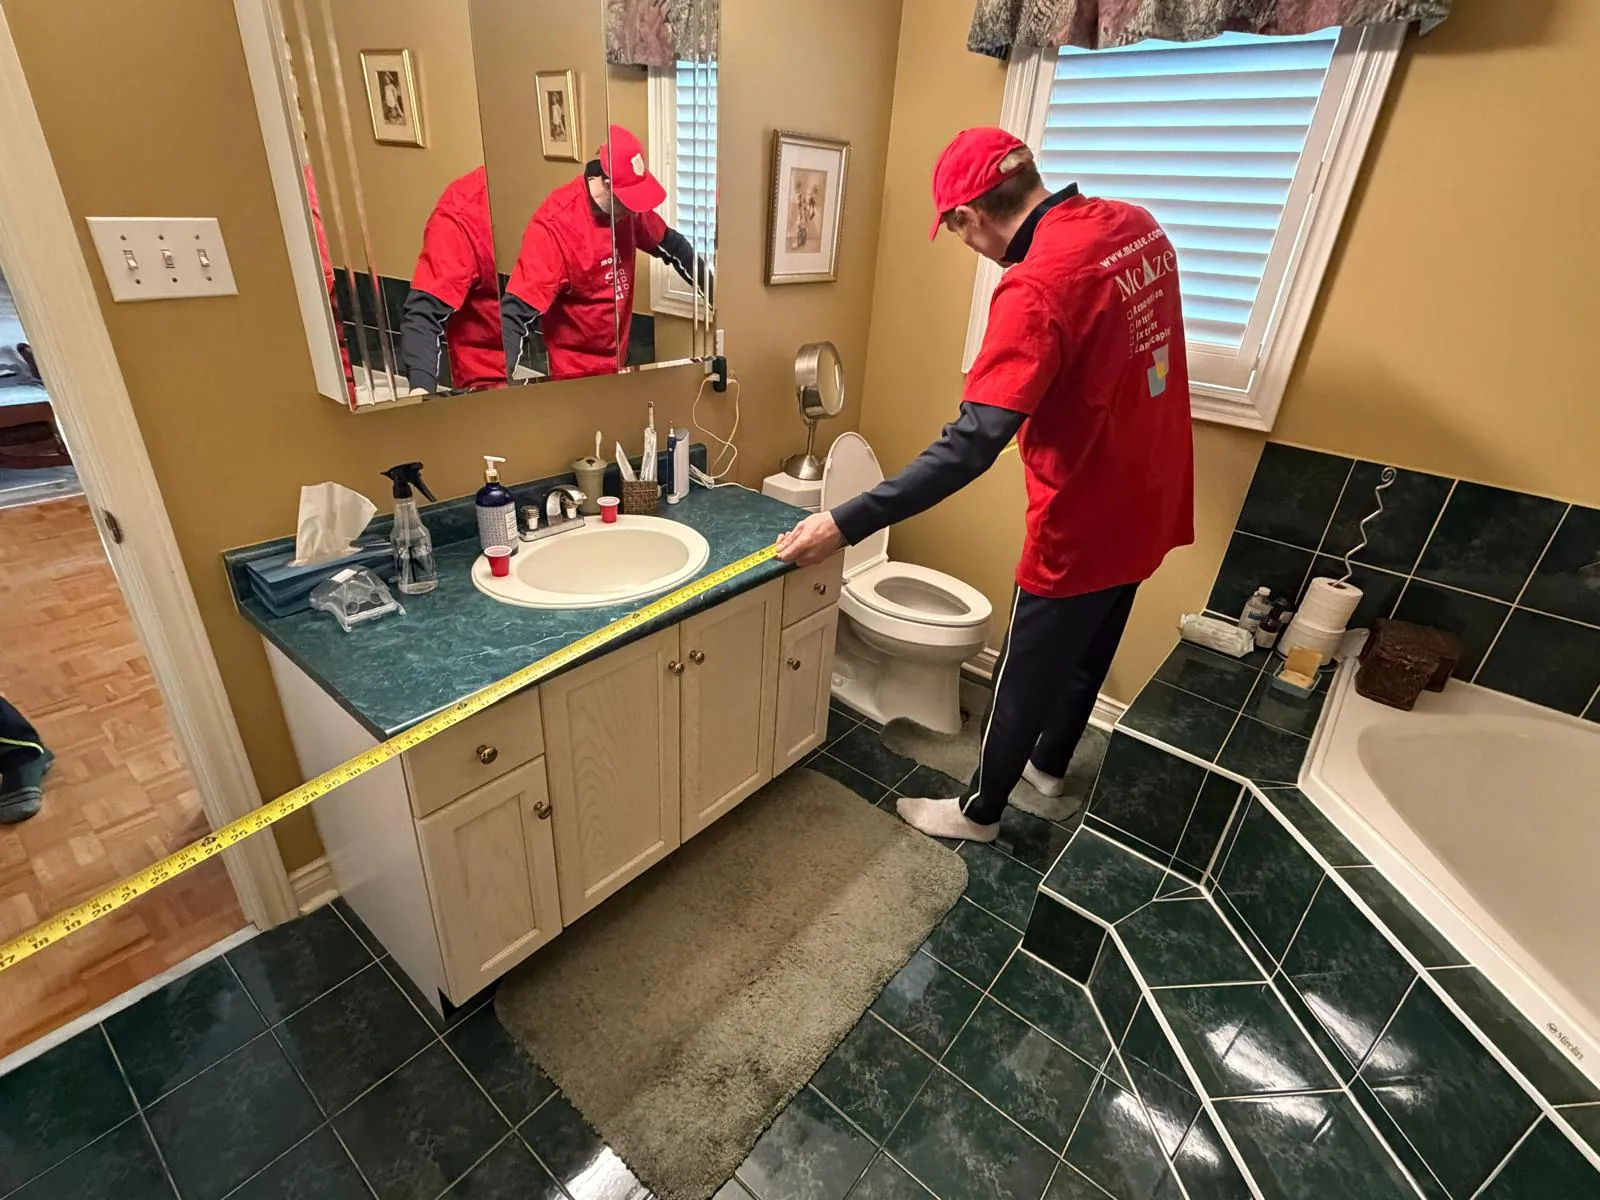
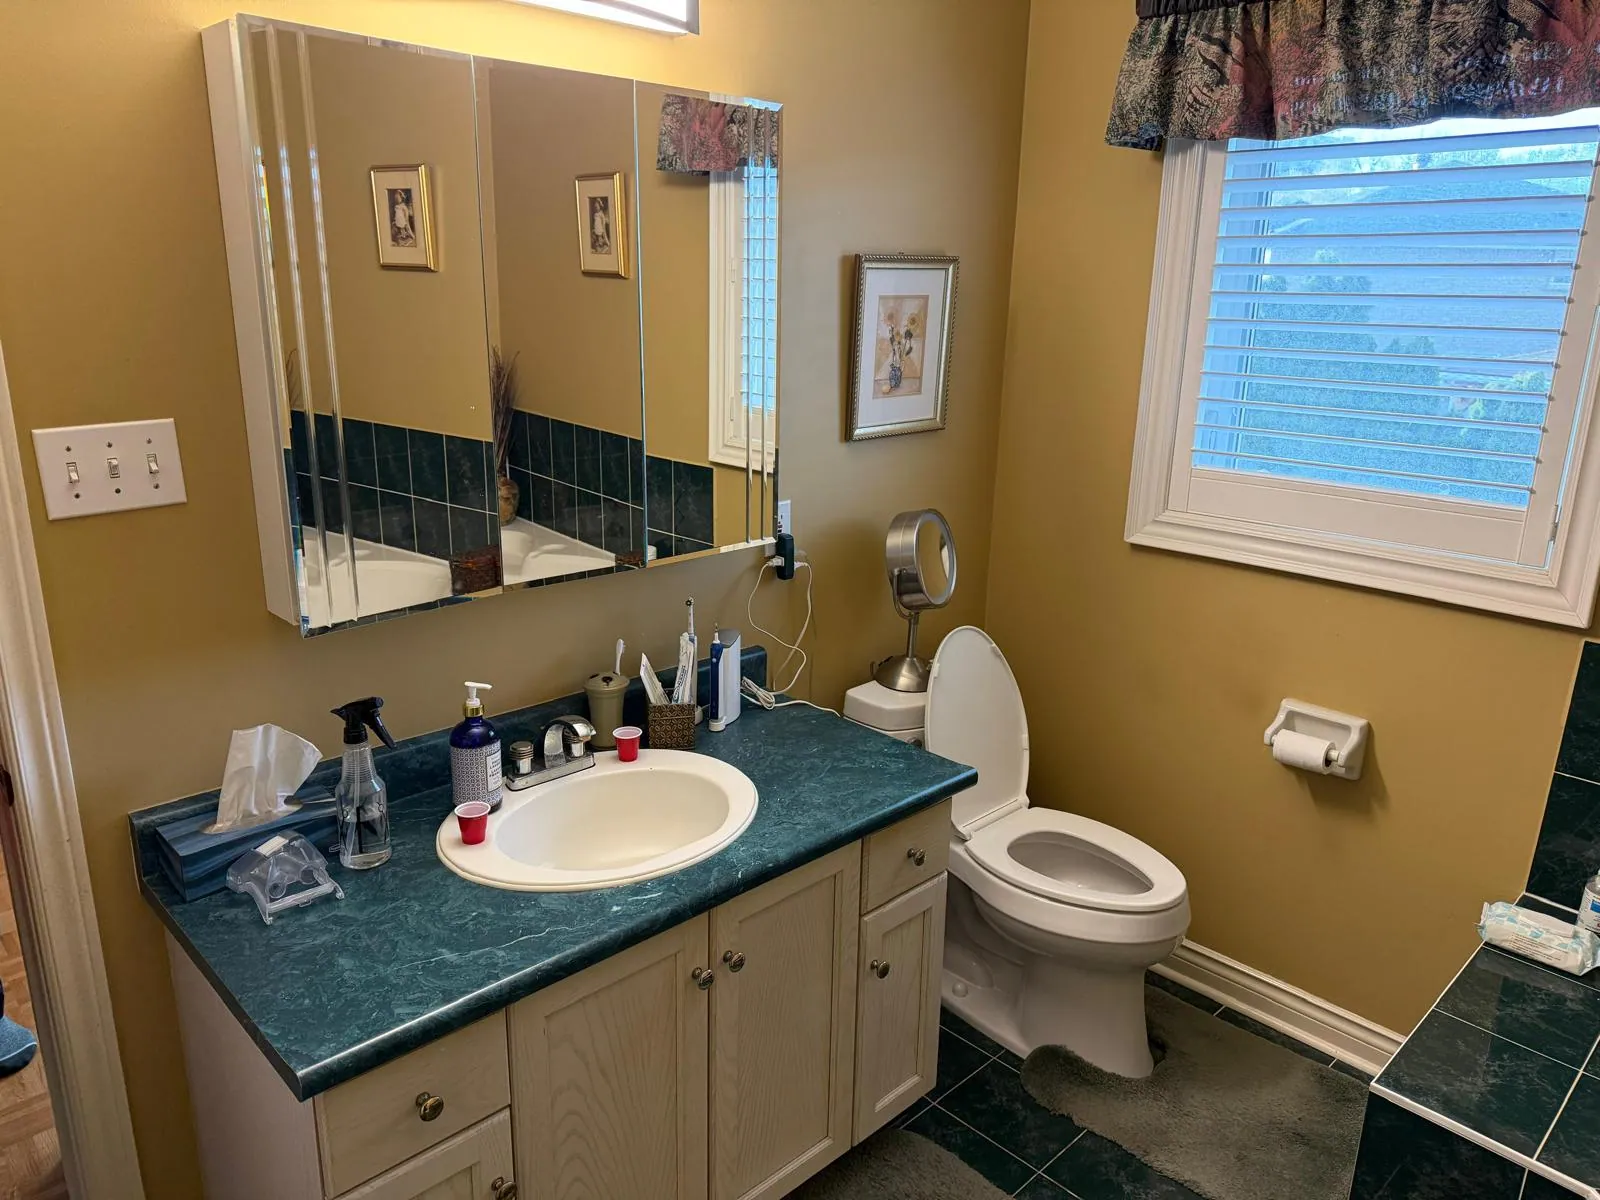
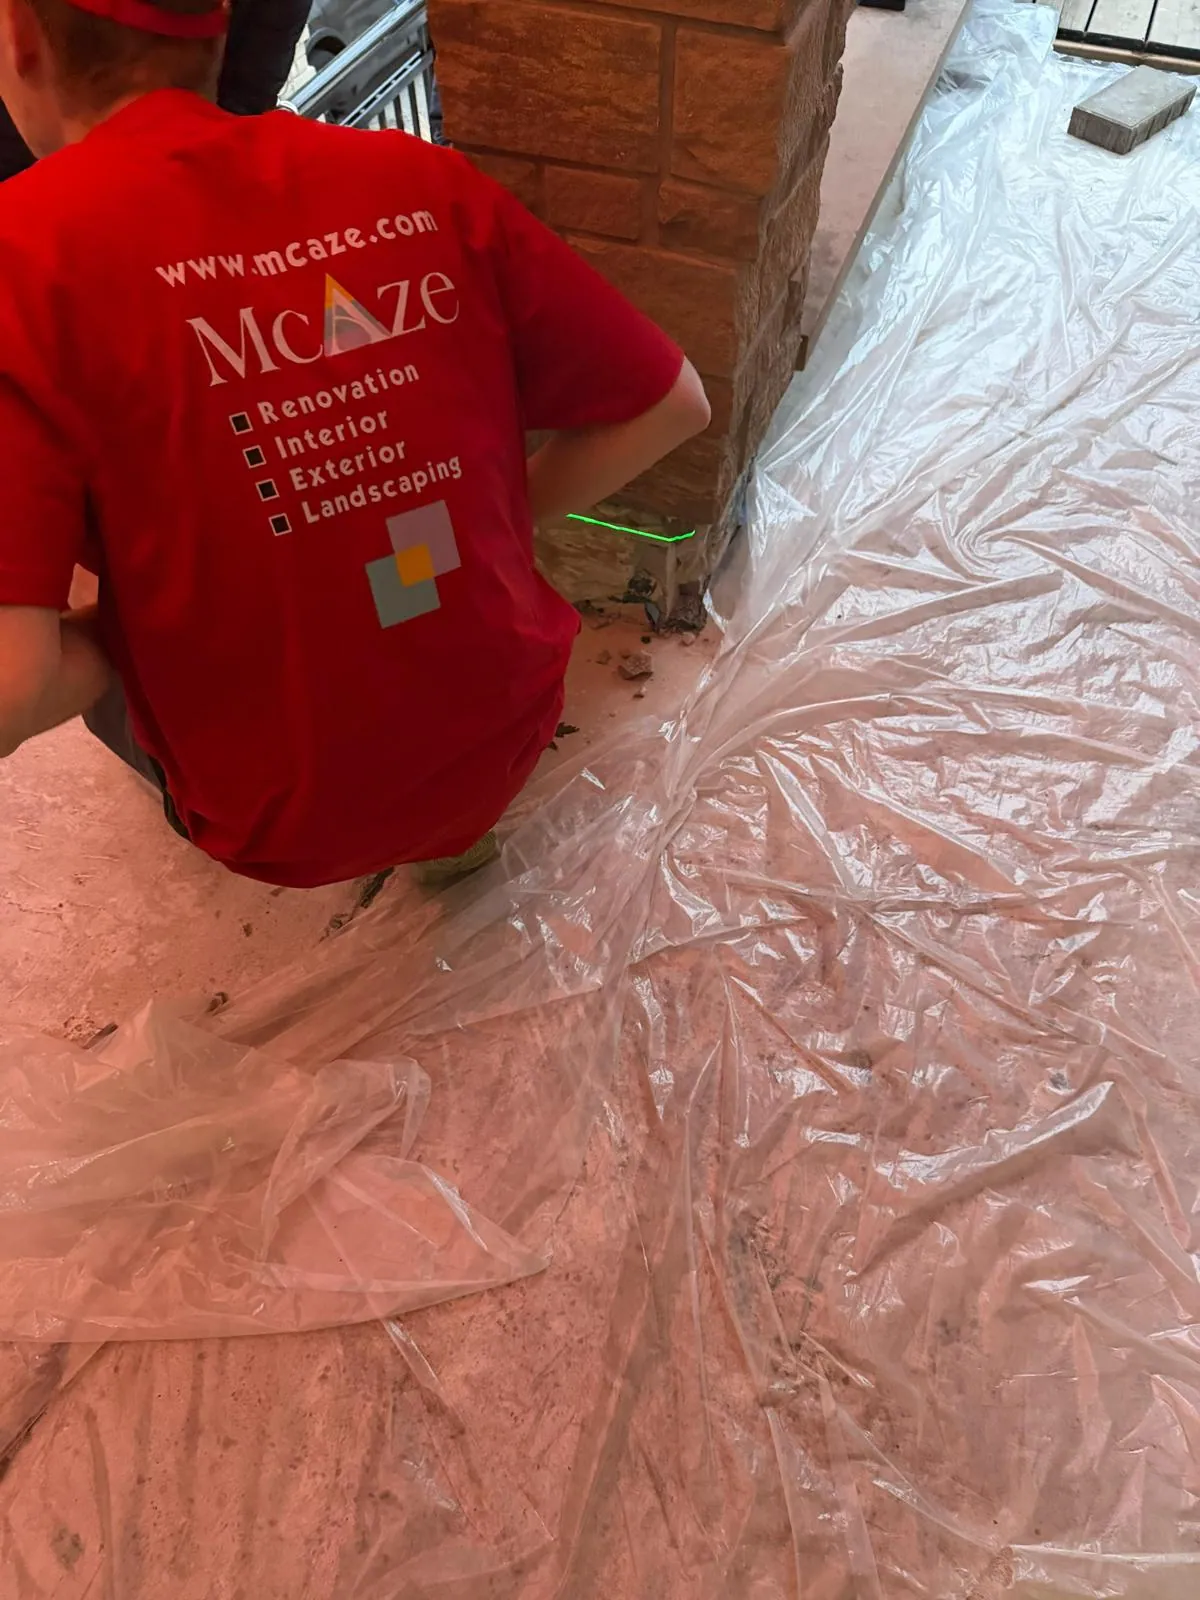
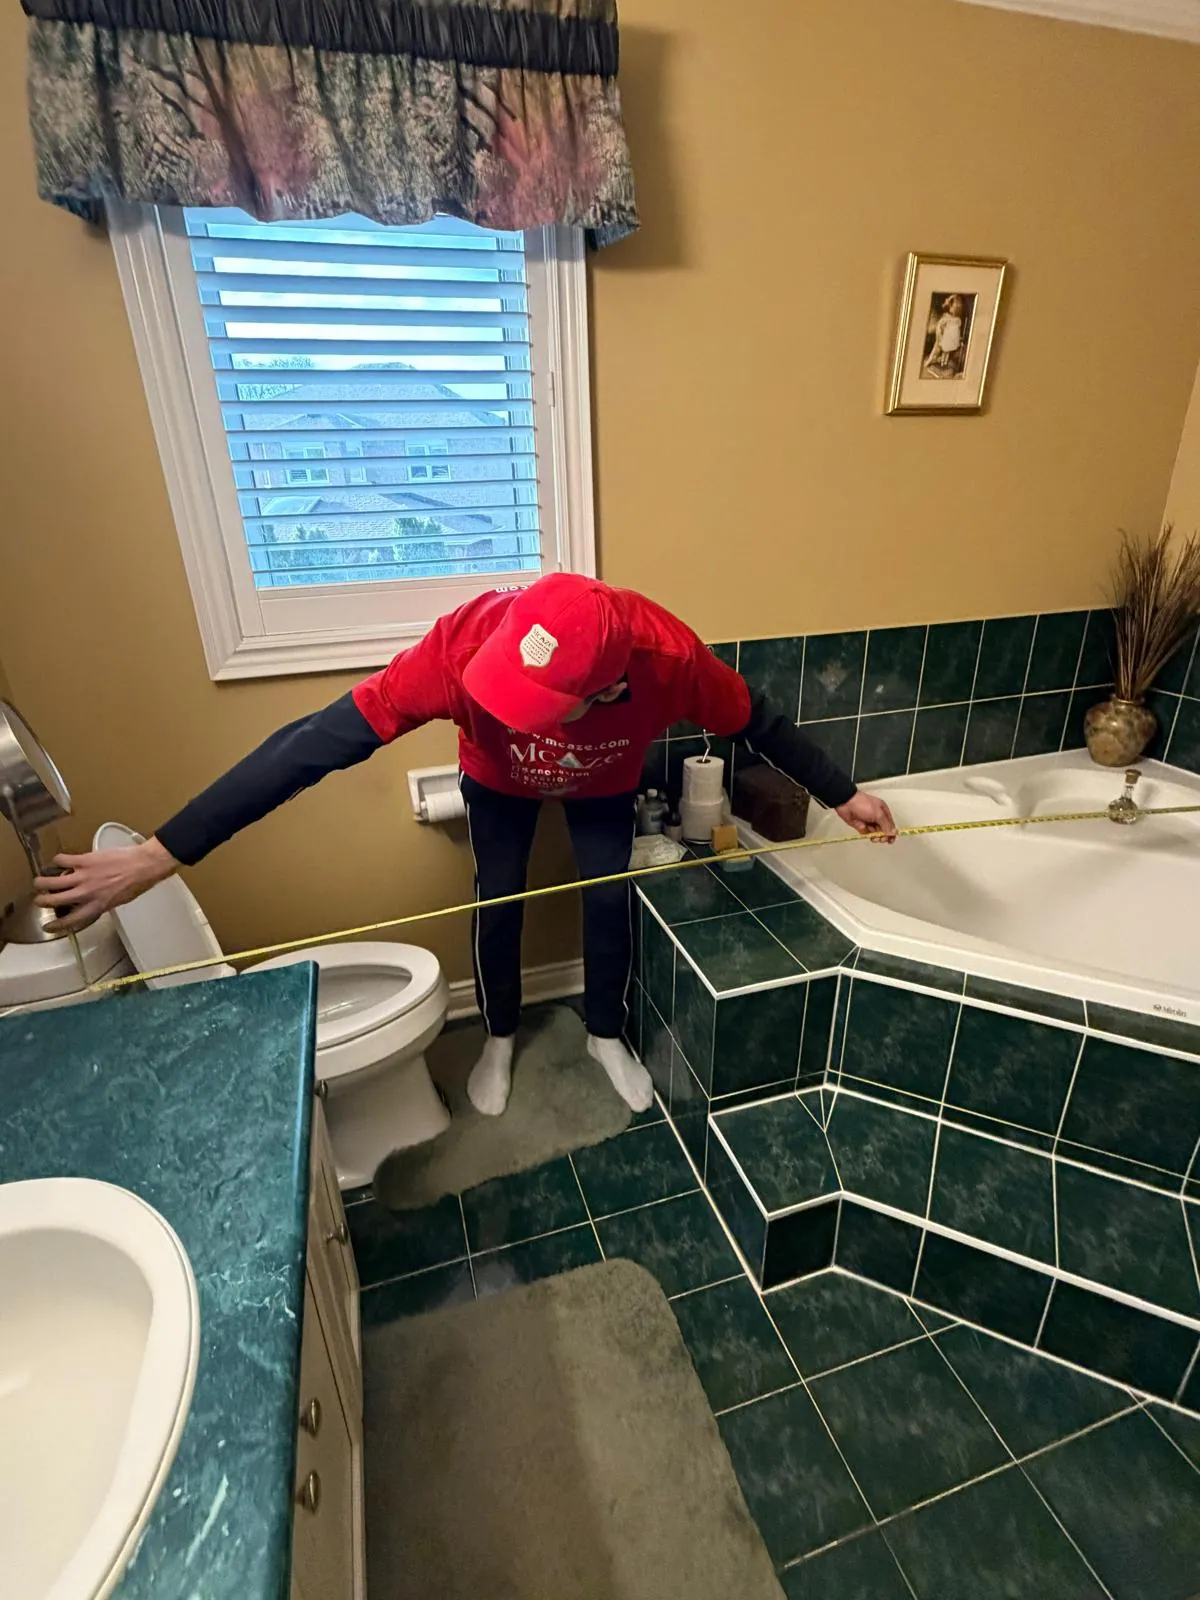
McAze measuring an existing bathroom before a full renovation in the Greater Toronto Area

Featured Project · Greater Toronto Area (GTA), Ontario

Full Bathroom Renovation in the GTA, Ontario

A complete GTA bathroom remodel addressing water-damaged shower conditions, outdated fixtures and an inefficient layout through demolition, repairs, waterproofing, a new shower, vanity, toilet, tile, trim, painting and final finishing.

Project overview

A complete bathroom renewal built around durability and daily use

A successful bathroom renovation must improve much more than appearance. The room combines water management, plumbing, electrical work, ventilation, structural support, tile, cabinetry and daily comfort in a compact footprint. For this Greater Toronto Area project, McAze completed a full bathroom remodel planned around visible shower-base damage, outdated finishes and a layout that no longer provided the desired function.

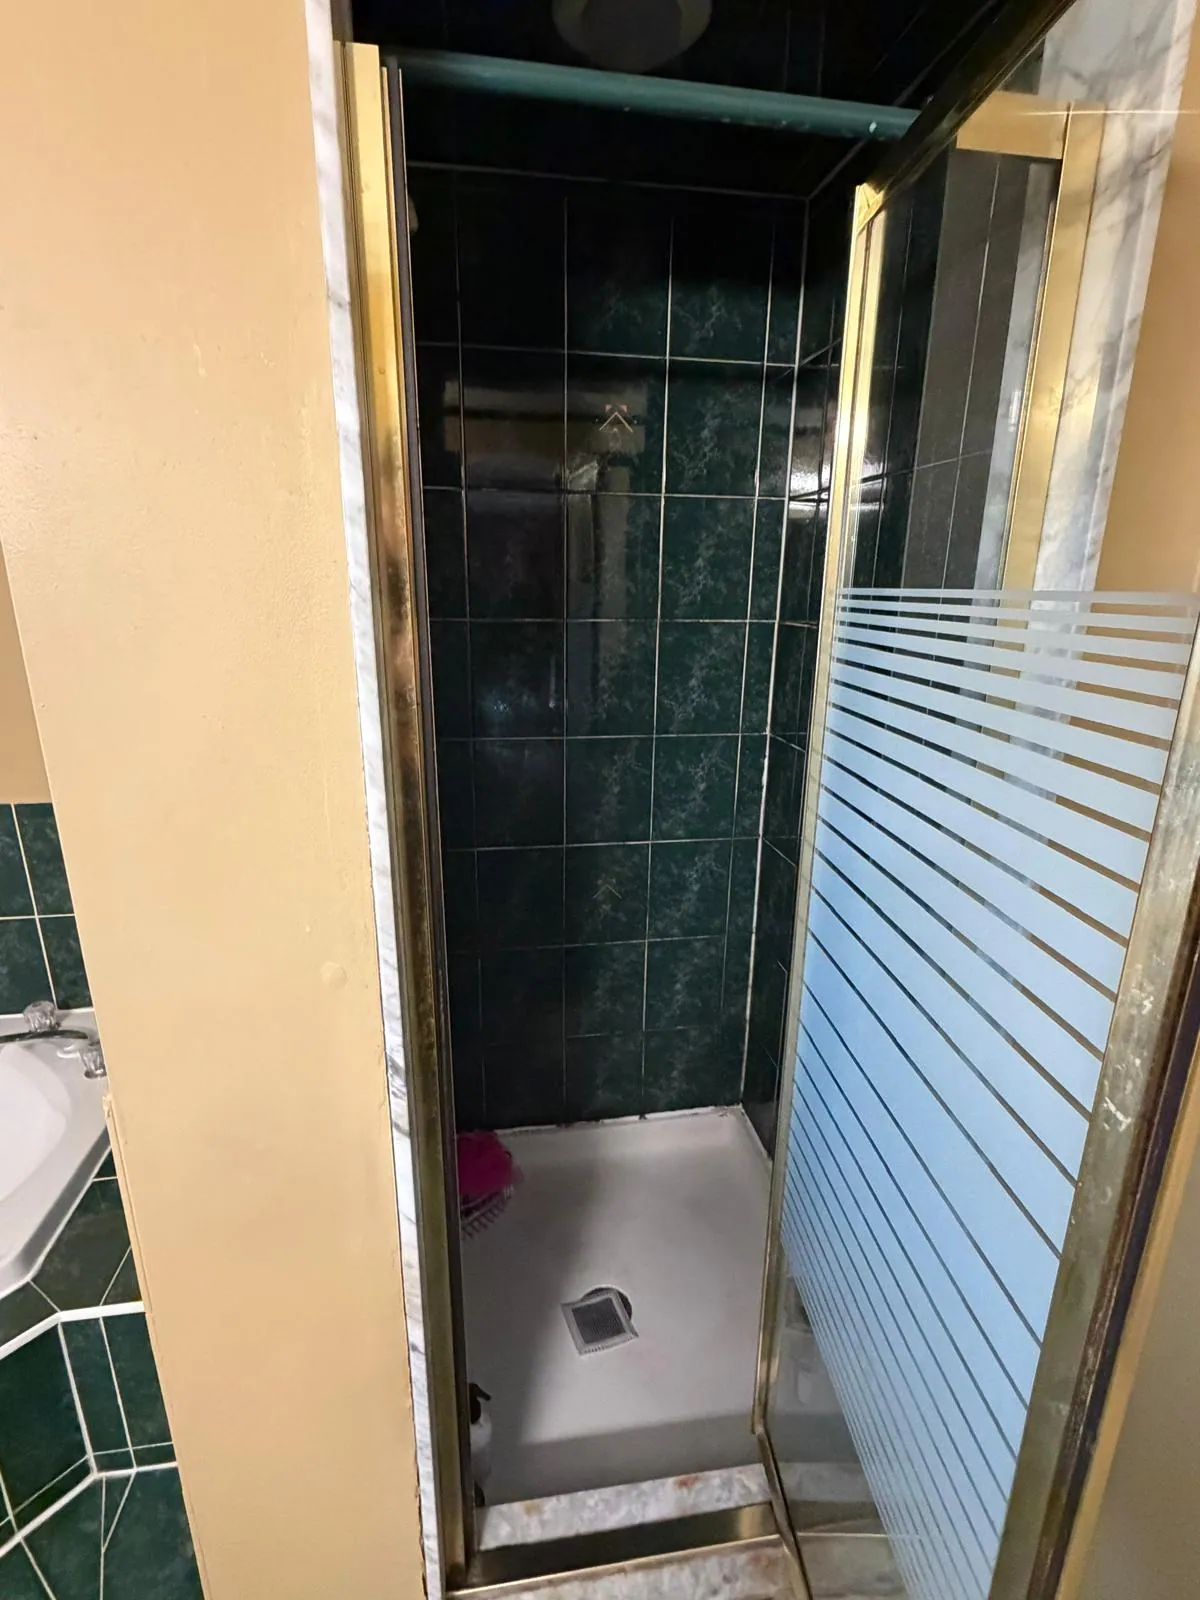
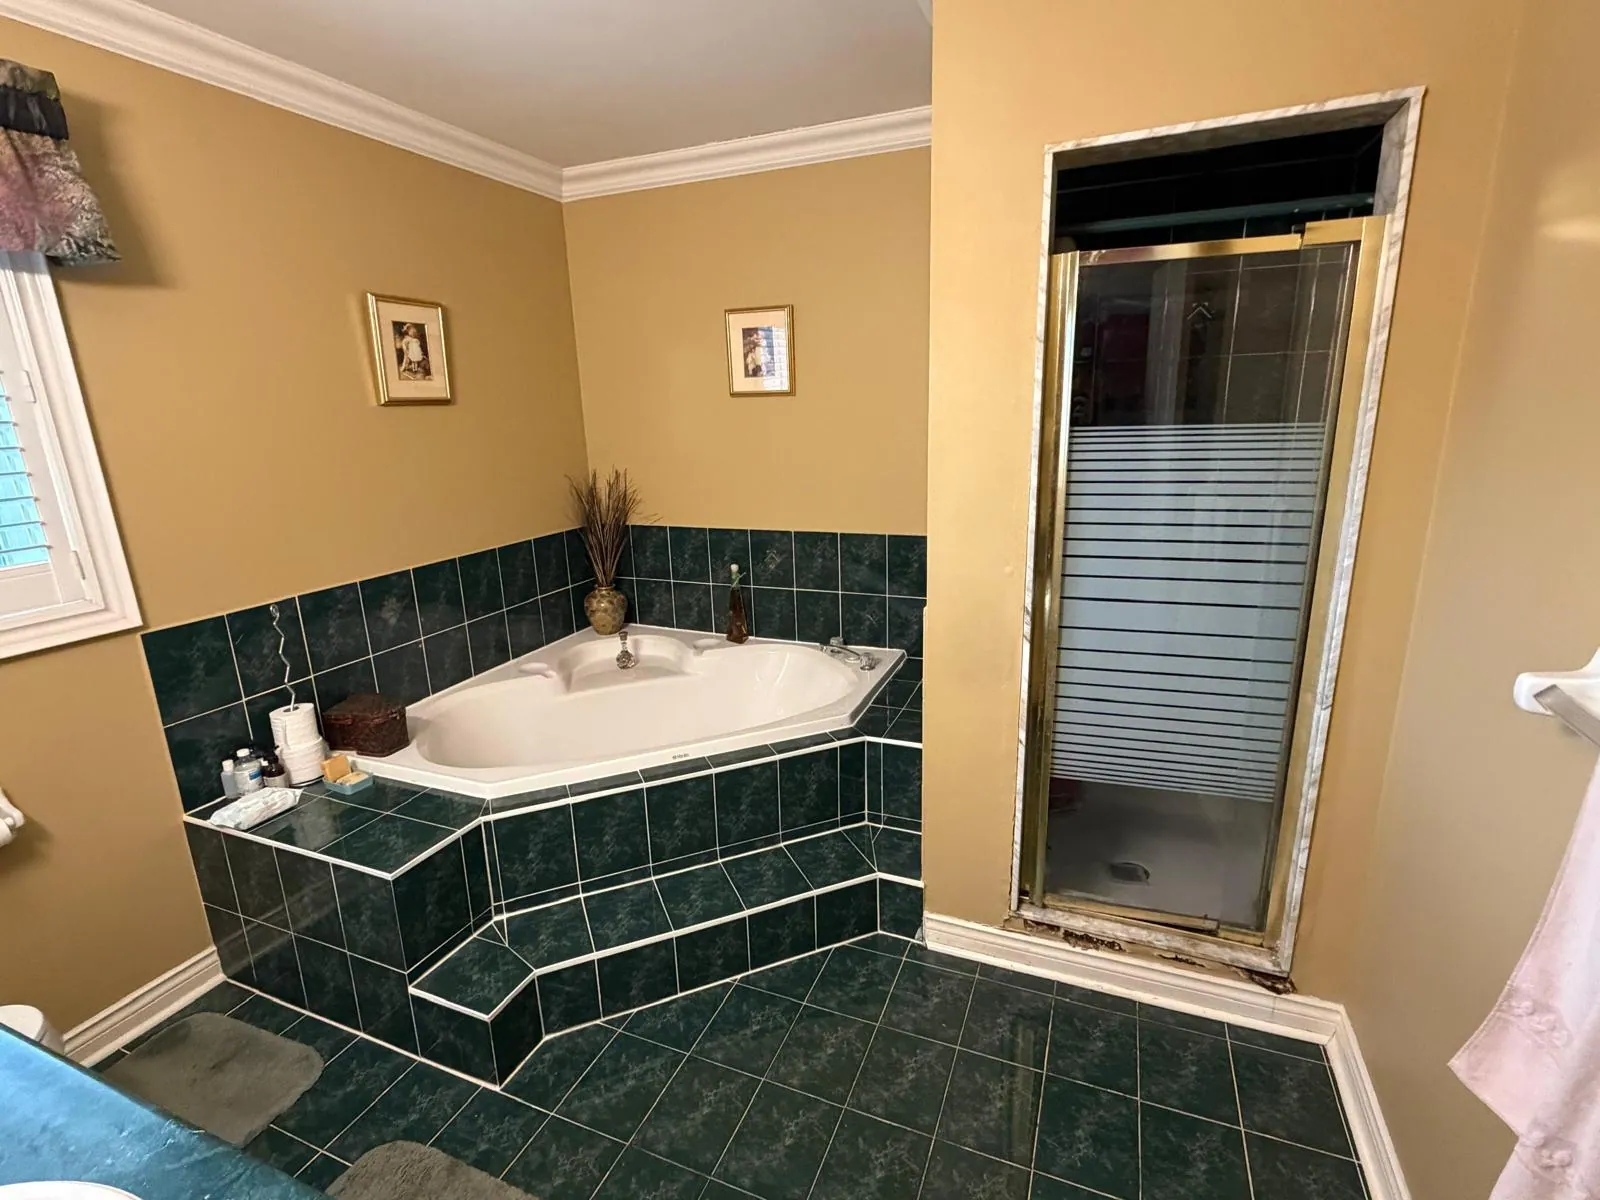
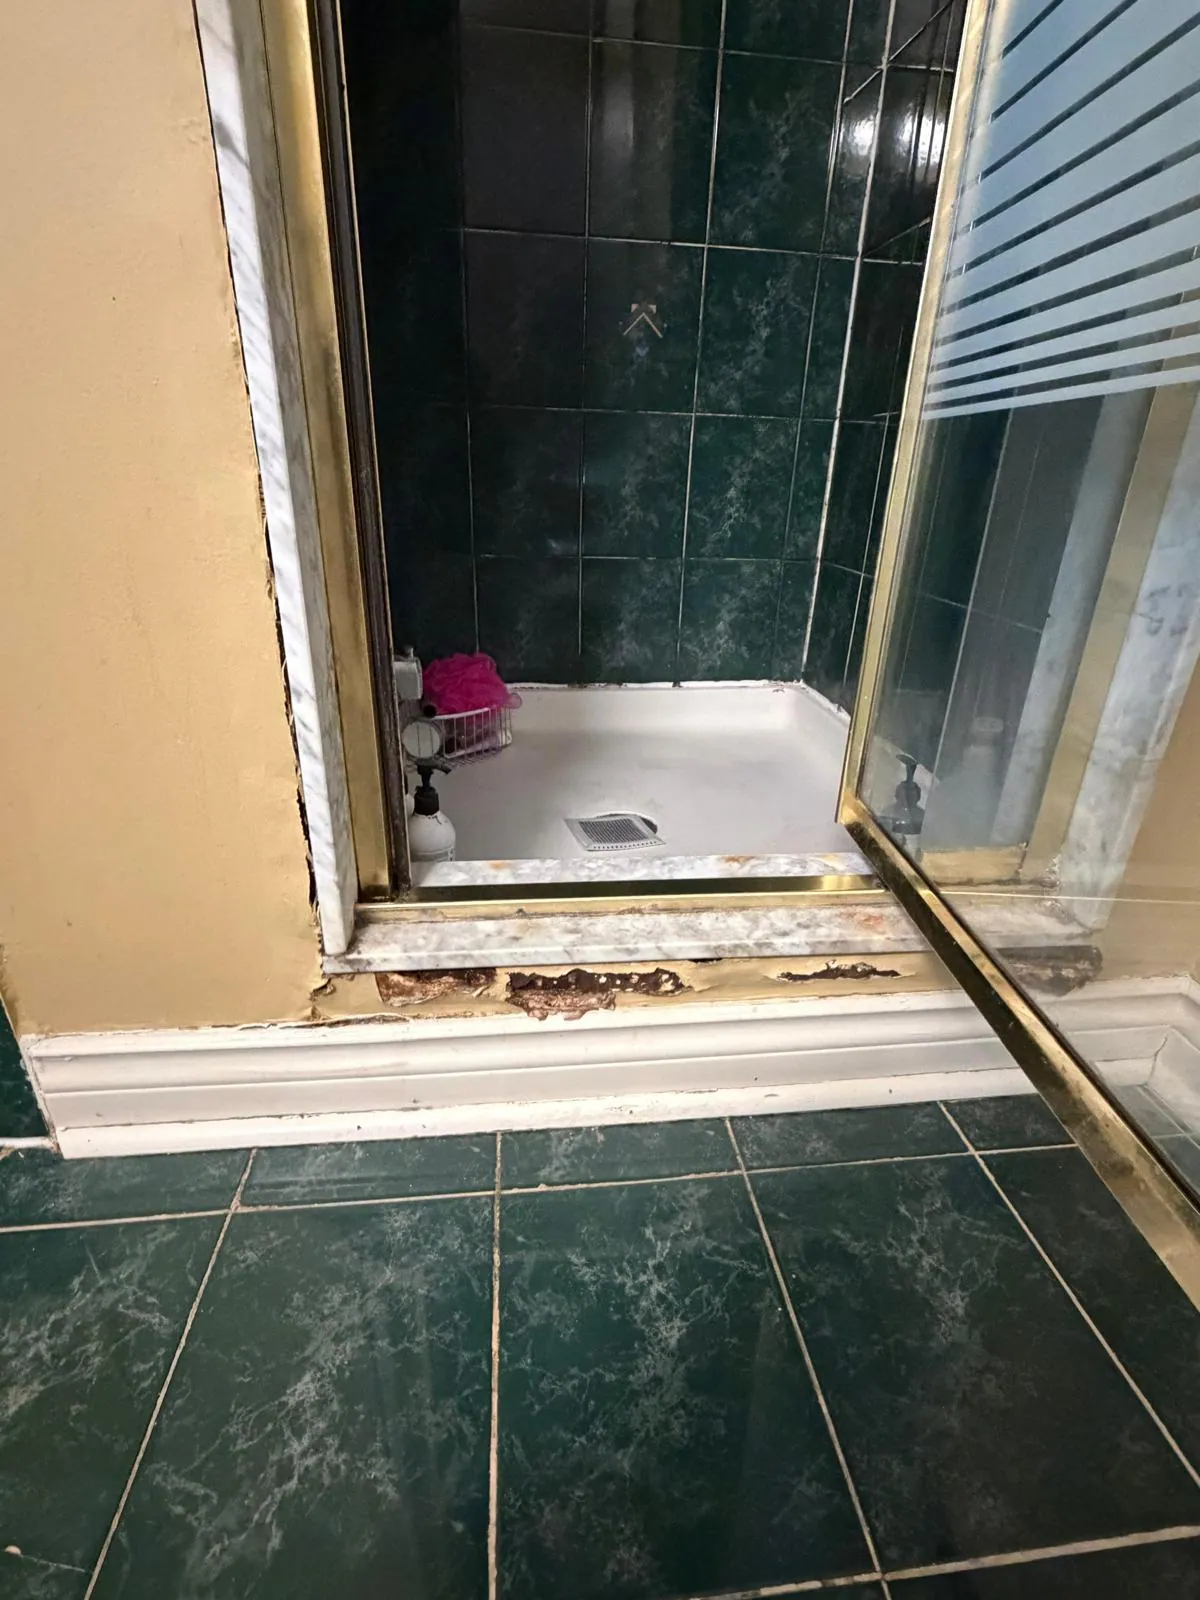
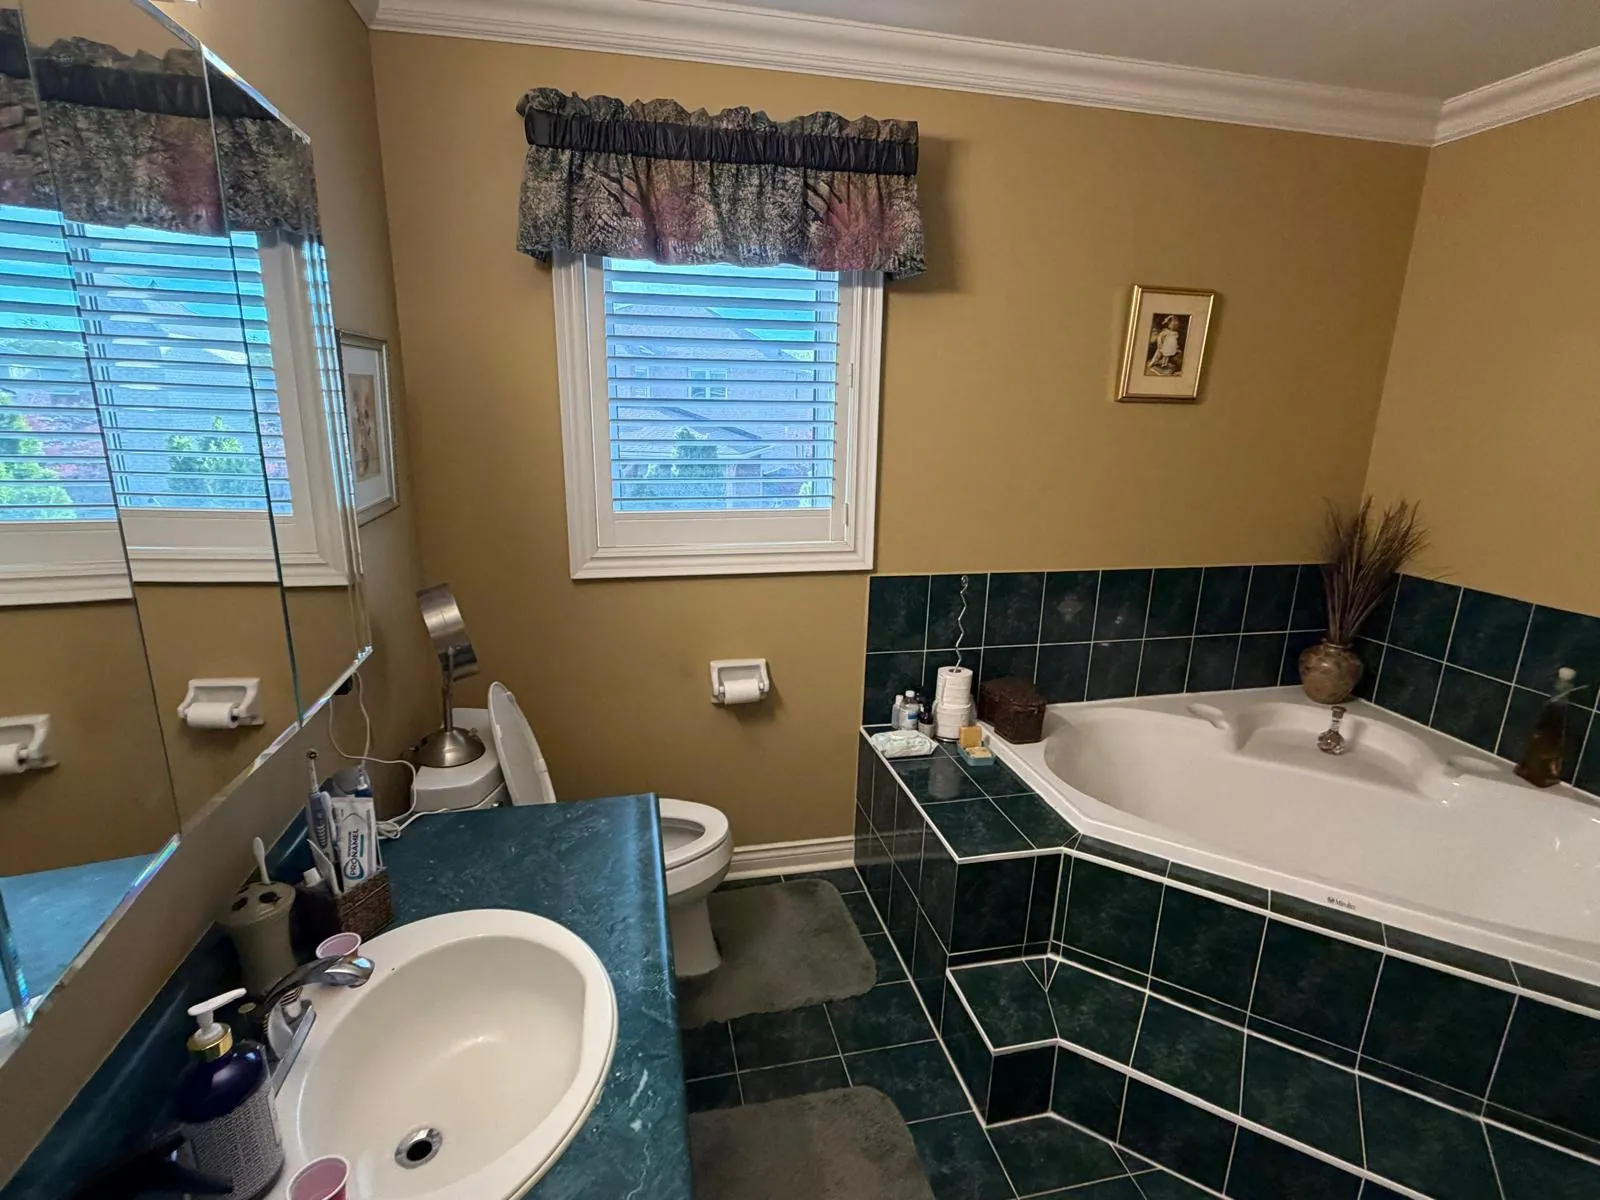
The original bathroom included a corner bathtub, separate framed-glass shower, long vanity, toilet and extensive dark-green wall and floor tile. Deterioration around the shower curb and lower enclosure indicated that the wet area required careful opening and repair rather than a surface-only update. McAze documented dimensions and visible defects before demolition so the new design could respond to the real room.

The complete scope included controlled demolition, repair of moisture-affected areas, waterproofing, shower replacement, a new vanity and sink, toilet replacement, floor and wall tile, plumbing and electrical updates, moisture-resistant wall materials, painting, trim and final cleaning. These elements were coordinated as a single assembly to create a modern bathroom designed for durable everyday use.
The challenge

Water damage, dated finishes and a layout ready for change

Water damage was visible around the existing shower base and enclosure transition. Until finishes were removed, the full extent of affected backing, framing or subfloor conditions could not be confirmed. The scope needed enough flexibility to repair concealed damage without lowering the waterproofing standard.

The original arrangement used substantial floor area for a corner tub, tiled platforms and a separate shower. Fixture dimensions, door clearances and circulation had to be considered together so the renewed layout would remain comfortable without creating tight access around the vanity or toilet.

Bathroom work requires several trades in a confined space. Demolition, framing repairs, plumbing, electrical work, drywall, waterproofing, tile and glass each depend on accurate work completed earlier. A sequencing error can hide an unresolved issue or require new finishes to be opened again.

The solution

Repair first, waterproof carefully and rebuild as one system

McAze began with measurements and a detailed existing-condition review. The room, fixtures, shower opening, tub platform, vanity and service locations were documented. Demolition then exposed the actual wet-area construction so moisture-damaged or unstable materials could be removed back to a sound repair boundary.

The shower and other wet surfaces were rebuilt around a continuous waterproofing strategy. Substrates, slopes, corners, penetrations and transitions were prepared for the selected membrane and tile system. Plumbing and electrical requirements were coordinated before those assemblies were concealed.

Tile, fixtures, vanity, toilet, trim and paint were installed after the underlying systems passed their stage checks. Final work included glass coordination, sealant, hardware, testing, touchups and cleaning, producing a complete bathroom rather than leaving finishing tasks disconnected from the main renovation.

Complete scope

A full bathroom remodel from controlled demolition to final cleaning

The work connected demolition, moisture-damage repair, waterproofing, plumbing, electrical coordination, tile, fixtures and finishing so concealed performance and visible design were resolved within one complete scope.

01

Existing bathroom measurement and condition review

02

Fixture, finish and layout planning

03

Full controlled bathroom demolition

04

Removal of damaged shower and wet-area materials

05

Water-damage and localized structural repairs

06

Moisture-resistant drywall and backer preparation

07

Continuous shower and wet-area waterproofing

08

New shower base, wall and enclosure installation

09

Vanity, quartz or stone top and sink replacement

10

Toilet replacement and plumbing trim

11

Porcelain or ceramic floor and wall tile

12

Plumbing and electrical updates

13

Premium paint, trim and silicone finishing

14

Fixture testing, final cleaning and walkthrough

Finding the real repair boundary before finishes are selected

Existing-condition assessment

Finding the real repair boundary before finishes are selected

Visible deterioration at the shower base indicated that the renovation needed more than cosmetic replacement. McAze measured the room and documented the wet-area conditions before defining demolition, repair and waterproofing requirements.

Assessment and design

Planning the full bathroom remodel from accurate existing conditions

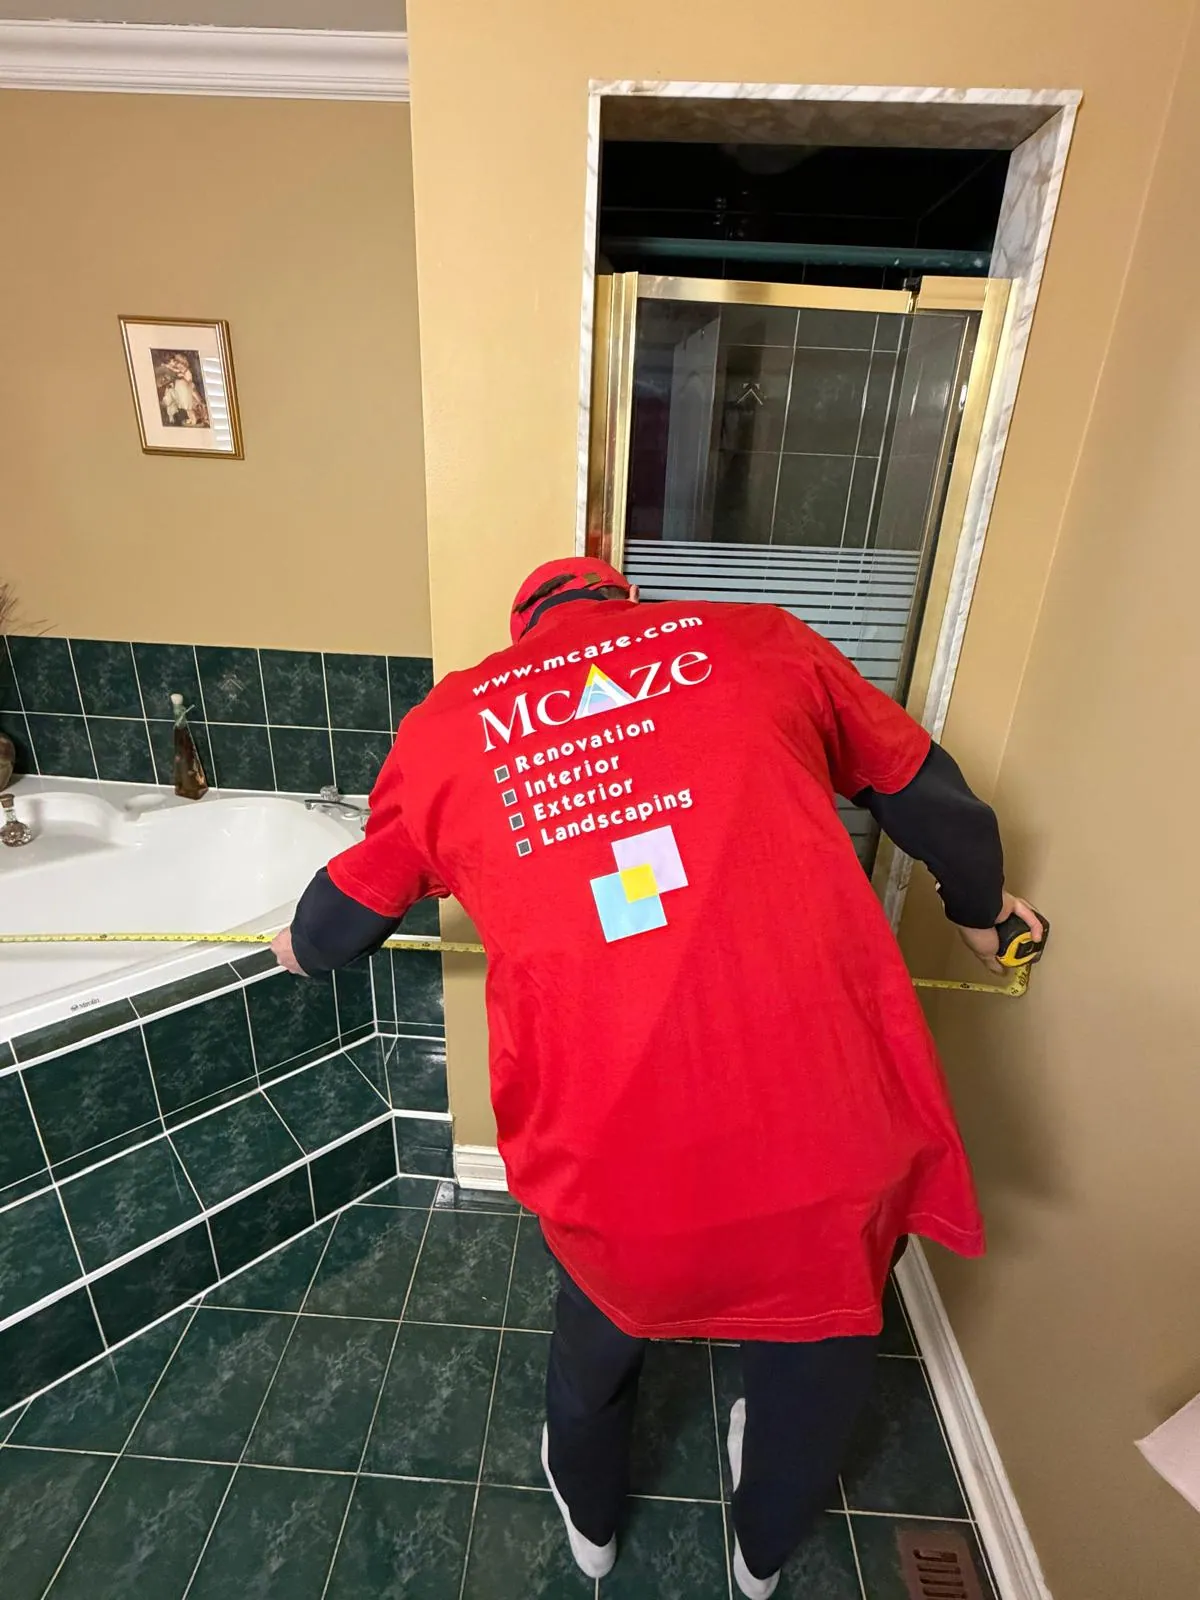
Bathroom design begins with the room that actually exists. McAze measured wall lengths, fixture positions, shower dimensions, window relationships and circulation zones before the old finishes were removed. The photographs show these checks across the vanity, tub platform and shower enclosure. Accurate documentation helps determine what can remain, what must move and where the project may encounter concealed conditions.

The original room contained several strong visual and physical elements: dark tile across floors and walls, a corner tub, framed shower, wide vanity and traditional fixtures. Updating the space required more than choosing new colours. The new plan needed to balance storage, shower comfort, toilet clearance, door movement, lighting and practical cleaning.

Product selection was coordinated with installation requirements. Tile size affects layout and substrate flatness; a glass enclosure depends on finished opening dimensions; a vanity must suit plumbing and outlet positions. Reviewing these relationships before ordering reduces last-minute compromises and allows the project schedule to reflect actual material lead times.

  • Measure the complete room and each fixture zone
  • Document visible moisture and finish damage
  • Review circulation, door swings and storage
  • Coordinate product dimensions before rough-in
  • Confirm building and permit requirements where applicable

Controlled demolition

Opening the bathroom safely to reveal concealed conditions

Demolition is an investigative phase as well as a removal task. Existing shower glass, tile, backer, fixtures, vanity and selected wall materials were removed in a planned sequence so the supporting construction could be observed. Protection and dust control helped isolate the bathroom from the rest of the home.

Wet-area demolition requires attention around plumbing, electrical devices and adjacent finishes. Water is isolated as required, fixtures are disconnected and sharp glass or tile is handled in controlled sections. Materials are removed far enough to reach stable, repairable edges rather than stopping at an arbitrary line that leaves deterioration concealed.

Once the shower base and surrounding layers are open, the team can assess framing, subfloor, fasteners and previous waterproofing. Conditions that could not be proven from the surface are documented and incorporated into the repair plan. This protects the new installation from depending on material already weakened by moisture.

Original bathroom layout with vanity tub shower and toilet before renovation
Before: the full room view shows the relationship between the original fixtures.

Water-damage repair

Repairing moisture-affected areas before rebuilding the shower

Discoloration and deterioration at the original shower curb signalled a failure at a highly exposed transition. Water can travel behind tile or along framing before it becomes visible, so the repair boundary is based on material condition after demolition rather than the size of the surface stain.

Damaged or unstable components are removed and replaced with materials appropriate to their structural or substrate role. Framing and subfloor conditions are checked for soundness, geometry and fastening. The area must be dry and stable before it is enclosed again. If the source extends beyond the bathroom assembly, that issue is addressed before finish work resumes.

Repair work also restores the correct shape for the new shower. Walls need suitable alignment for tile, the base requires reliable support and drainage slopes must lead water toward the drain. Correcting these conditions at the substrate stage creates a stronger foundation for waterproofing and finish installation.

  • Remove compromised material back to sound construction
  • Confirm the area is dry before enclosure
  • Repair framing or subfloor where required
  • Restore flat, stable tile substrates
  • Coordinate shower geometry and drainage

Waterproofing

Creating a continuous wet-area system behind the visible tile

Tile and grout are the visible finish, but the waterproofing layer behind them is the primary control for water reaching the structure. The shower was rebuilt with a compatible membrane system extending across the required base, walls, corners, penetrations and transitions. Product-specific preparation and cure requirements were followed as part of the installation sequence.

Continuity matters most at changes in plane and penetrations. Corners, curb transitions, drain connections and plumbing outlets receive focused detailing because separate surfaces meet at those locations. Mixing unrelated materials or skipping accessories can create weak points even when the broad wall areas appear covered.

Waterproofing is inspected before tile hides it. Depending on the selected assembly and project requirements, this can include visual review, thickness or coverage checks and an appropriate flood or water test. Resolving issues while the membrane remains accessible is significantly easier than repairing a completed shower.

Shower replacement

Installing a modern shower with practical access and durable details

The new shower was planned around the available footprint and the intended daily use. Drain position, shower controls, spray direction, storage and glass movement were coordinated so the enclosure could function comfortably without creating avoidable water exposure outside the wet area.

Wall tile layout was established from visible focal points and the actual finished dimensions. Starting lines, corners, cut sizes and fixture penetrations were considered together. Consistent joints and balanced cuts support the modern appearance, while the substrate and waterproofing remain responsible for the assembly's concealed performance.

Tempered glass was coordinated after the tiled opening reached final dimensions. Mounting locations need adequate support and must respect the waterproofed assembly. Final installation includes hardware adjustment, perimeter sealant where appropriate and testing of door movement and water control.

  • Coordinate shower size, drain and control locations
  • Plan tile layout before setting material
  • Maintain required drainage slope
  • Measure glass from completed surfaces
  • Test enclosure movement and wet-area transitions

Vanity and fixtures

Combining storage, plumbing and countertop finishing

The vanity is a major visual element and a working service area. Cabinet width, door or drawer movement, sink position, faucet clearance, mirror, lighting and receptacles all influence one another. The replacement was selected and positioned to improve storage and create a cleaner relationship with the rest of the remodeled bathroom.

A quartz or stone vanity top provides a durable, cleanable surface when it is supported and finished correctly. Openings and wall relationships are checked before final installation. The sink, faucet, drain and shutoffs are connected with service access preserved inside the cabinet.

After plumbing is active, the faucet and drain are tested through normal use and visible joints are observed. Countertop-to-wall and fixture transitions receive compatible silicone where required. Hardware alignment, cabinet operation and surface cleaning complete the vanity installation.

Tile and flooring

Coordinating wall tile, floor tile and safe transitions

Bathroom tile must respond to both design and physical conditions. Porcelain or ceramic products were selected for their intended wall or floor use, with size, texture and slip considerations reviewed for the location. The tile system also includes the setting material, grout, movement joints, trims and substrate beneath the visible surface.

Floor preparation supports a flat, stable installation and clean transitions at the doorway, vanity, toilet and shower. Layout lines help avoid narrow cuts in prominent locations and keep joints visually coordinated. Tile around plumbing penetrations and curved fixture bases is cut carefully so cover plates and sealant can finish the opening.

Grout colour and joint size affect the final visual rhythm. Perimeter and change-of-plane joints are treated according to the assembly rather than rigidly filled where movement is expected. After cure, the surfaces are cleaned without damaging fresh grout or adjacent finishes.

Plumbing, electrical and ventilation

Completing the systems that make the bathroom functional

A full remodel provides an opportunity to review fixture connections, shutoffs, drainage, outlets, switches, lighting and ventilation before new walls and tile conceal access. Plumbing and electrical updates were coordinated with the selected shower, vanity and fixtures rather than treated as afterthoughts.

Bathroom electrical requirements reflect the wet environment and applicable code. Device type, circuit protection, fixture suitability and switching are confirmed by qualified professionals where required. Lighting is planned for useful illumination at the vanity and across the room without conflicting with mirrors, cabinet doors or shower-clearance requirements.

Ventilation helps manage everyday moisture after the renovation is complete. Fan operation, duct conditions and control strategy are reviewed within the project boundaries. A powerful finish system cannot compensate for poor moisture removal, so homeowner use and maintenance remain part of long-term bathroom performance.

  • Coordinate fixture rough-ins with final product dimensions
  • Test supply, drainage and shutoff operation
  • Use bathroom-appropriate electrical devices and fixtures
  • Review lighting at vanity and general room areas
  • Confirm practical ventilation and homeowner operation

Painting and trim

Finishing the dry areas around the new bathroom assembly

Not every bathroom surface needs tile. Moisture-resistant wall materials, suitable primer and premium bathroom paint create durable finishes in dry zones while allowing the room to remain visually balanced. Seams, fasteners and repaired areas are finished and sanded before coating.

Trim at doors, windows, baseboards and transitions is coordinated with tile thickness and flooring height. Clean carpentry and caulking help the room feel complete, but functional gaps and movement joints are respected. Painted components are given appropriate drying time before hardware or regular use.

Final colour and sheen are assessed under the installed lighting. Touchups are completed after major fixtures and glass are in place because installation can expose small marks or unfinished edges. The result is reviewed as one room rather than as isolated tile, paint and cabinet packages.

GTA bathroom renovation

Planning a complete bathroom remodel in Toronto and surrounding cities

Bathroom projects across the GTA vary with building age, housing type and existing construction. A condominium may require management approvals and elevator bookings, while a detached home may present older plumbing, framing or ventilation conditions. A site review helps distinguish cosmetic updates from work that requires opening and repair.

Homeowners can prepare for an estimate by identifying known leaks, desired fixtures, layout priorities, product preferences and timing. Photographs and approximate dimensions are useful, but final selections should be coordinated with real site measurements and the installation requirements of each product.

McAze serves Toronto, Vaughan, Richmond Hill, Markham and surrounding communities with complete bathroom renovation work. A written scope can define demolition, repair allowances, waterproofing, tile, fixtures, trade coordination, finishing and cleanup so quotes are compared on project completeness rather than a headline number alone.

Visible materials

Products and assembly components

  • Porcelain and ceramic floor or wall tile
  • Compatible waterproof membrane and accessories
  • Moisture-resistant drywall and tile backer
  • Quartz or stone vanity top
  • Vanity cabinet, sink and faucet
  • Tempered-glass shower enclosure
  • Shower base, drain and plumbing components
  • Toilet and chrome plumbing fixtures
  • Electrical devices and bathroom lighting
  • Premium moisture-resistant paint
  • Kitchen-and-bath silicone and finishing materials

Quality control

Checks before the work is concealed

  • Damage boundary and substrate stability reviewed after demolition
  • Plumbing locations and shower drainage checked before concealment
  • Wet-area substrate, corners and penetrations inspected
  • Waterproofing continuity verified before tile
  • Tile layout, slope, joints and transitions reviewed
  • Vanity, toilet and shower fixtures checked for secure operation
  • Plumbing connections tested for visible leakage
  • Glass, silicone, paint and trim inspected before final cleaning

Project FAQ

Questions about full bathroom renovation

Practical planning information based on the wet-area damage, layout and complete renovation scope identified for this GTA bathroom.

What is included in a full bathroom renovation?

A complete scope can include demolition, damage repair, plumbing and electrical coordination, moisture-resistant substrates, waterproofing, tile, shower, vanity, toilet, glass, paint, trim, sealant, testing and final cleaning.

How is water damage handled during a bathroom remodel?

Finishes are removed far enough to expose the affected area, compromised materials are taken back to sound construction, the source is addressed and the assembly is dried and repaired before waterproofing and new finishes.

Is tile itself waterproof?

Tile and grout are finish materials, not a complete waterproofing system. A compatible membrane and correctly detailed transitions behind the tile manage water at the wet-area assembly.

Can McAze replace the shower, vanity and toilet in one project?

Yes. Coordinating those fixtures within one full renovation helps align plumbing, electrical, tile, storage and finishing decisions in the correct sequence.

Where does McAze provide bathroom renovation services?

McAze reviews bathroom renovation projects across the Greater Toronto Area, including Toronto, Vaughan, Richmond Hill, Markham and nearby communities.

Bathroom renovation across the Greater Toronto Area

Planning a bathroom renovation in the GTA?

McAze provides complete bathroom renovation planning and construction across Toronto, Vaughan, Richmond Hill, Markham and surrounding GTA communities.

Bathroom Renovation in Toronto

Planning a bathroom renovation?

Contact McAze today for a free consultation and estimate covering demolition, waterproofing, tile, fixtures and the finishing details required for a complete bathroom remodel.

Get Free Estimate